

These days rolling out a Kubernetes cluster on any cloud provider is quite simple and easy, but not always cost effective. Us as DevOps/Ops Engineers are spoilt with the ease of configuration and not being able to see “behind the curtain”, especially on the master control plane. But there is always that nagging question as to how that works. Let’s peel away that curtain and go on a journey to build our own HA(Highly Available) Kubernetes cluster on AWS.
This walkthrough is essential for people who support Kubernetes clusters in production and want to understand how it all fits together; and how all this runs on AWS. This work is based off of Kelsey Hightower’s Kubernetes The Hard Way Guide which was deployed to GCP (Google Cloud Platform).
Below is a simple representation of what the infrastructure architecture, of what we want to achieve, would look like:
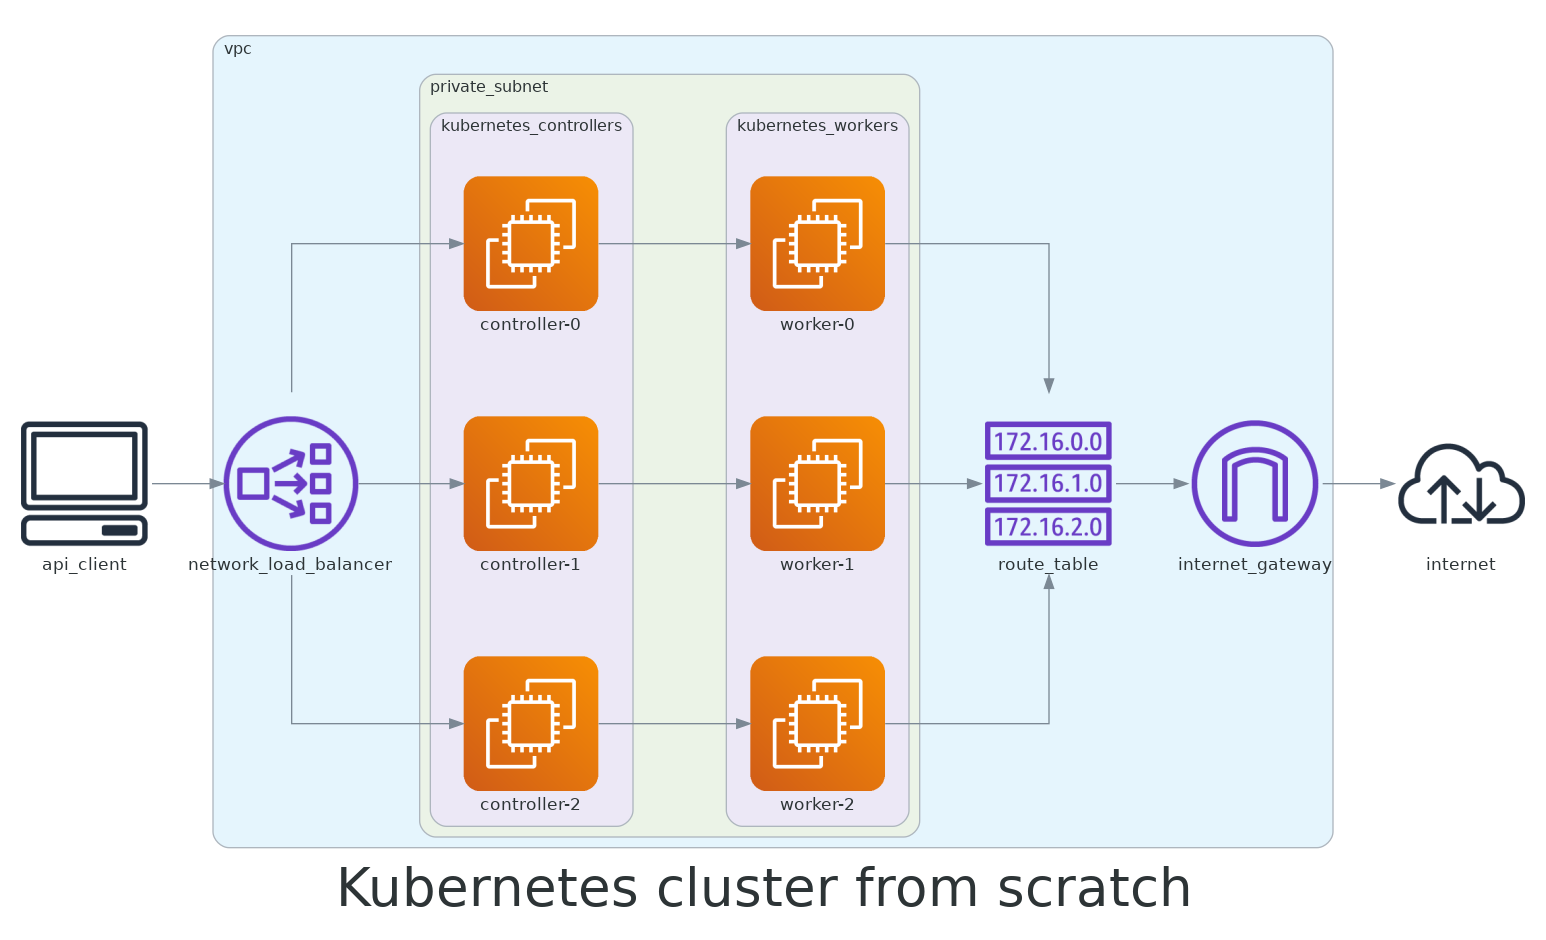
We will need to provision the following compute resources in AWS:
- Networking — VPC, Subnet, Internet Gateway, Route Tables, Security Groups, Network Load Balancer
- Compute Instances — EC2 nodes for controllers and workers, SSH Key Pair
Before we begin, we first need to ensure we have some prerequisites:
Have an AWS account setup (hopefully with some free credit, but this cluster will not cost us much to provision as we will tear it down afterwards).
Install the AWS CLI for interacting with your AWS account to provision resources; or you can use the AWS Cloud Shell which is a browser based alternative to setting all this up on your machine.
Pick an AWS zone you want to deploy in, preferably closer to where you are; for me I am choosing eu-central-1 as that is my closest AWS region.
You can also install and use tmux to simplify running the same commands on multiple instances.
We will be generating quite a few PKI Infrastructure keys and generate TLS certificates as we want everything to be secure. Ensure that you have cfssl and cfssljon command line utilties installed.
Because we will be using Kubernetes, we also need to make sure that we have our trusty kubectl client installed so we can perform actions on our Kubernetes cluster.
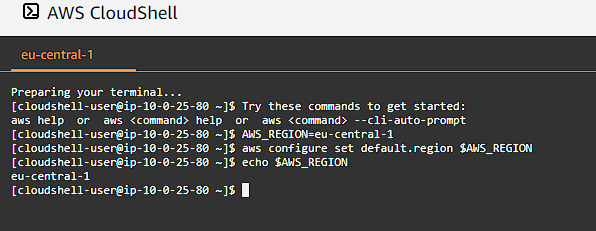
Set a Default Compute Region and Zone
In your terminal window or in your AWS CloudShell window run:
1
2
AWS_REGION=eu-central-1
aws configure set default.region $AWS_REGION
Installing some client tools we need
I am going to be using examples using linux here, but if you are using some other OS like Mac OS X, then refer to this page here.
1
2
3
4
5
6
7
8
9
10
11
wget -q --timestamping \
  https://storage.googleapis.com/kubernetes-the-hard-way/cfssl/1.4.1/linux/cfssl \
  https://storage.googleapis.com/kubernetes-the-hard-way/cfssl/1.4.1/linux/cfssljson
chmod +x cfssl cfssljson
sudo mv cfssl cfssljson /usr/local/bin/
cfssl version
cfssljson --version
wget https://storage.googleapis.com/kubernetes-release/release/v1.21.0/bin/linux/amd64/kubectl
chmod +x kubectl
sudo mv kubectl /usr/local/bin/
kubectl version --client

Provisioning Compute Infrastructure
Best practise with AWS dictates that we wrap our “project”/”product” into it’s own VPC (Virtual Private Cloud) with Subnets, Routing tables, Load Balancers and an Internet Gateway (of which only 1 Internet Gateway is allowed per VPC). This is not only a grouping mechanism, but also a layer of security.
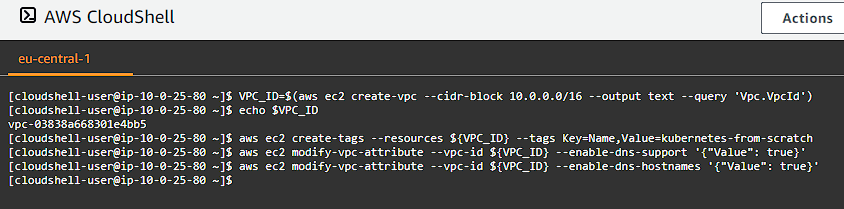
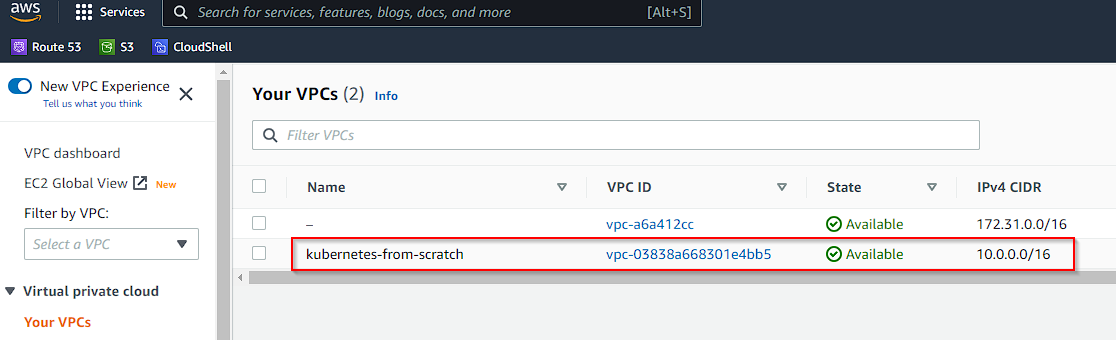
VPC
Let’s set up a VPC called kubernetes-from-scratch that has DNS support and DNS hostname support enabled. Execute the following in your terminal session:
1
2
3
4
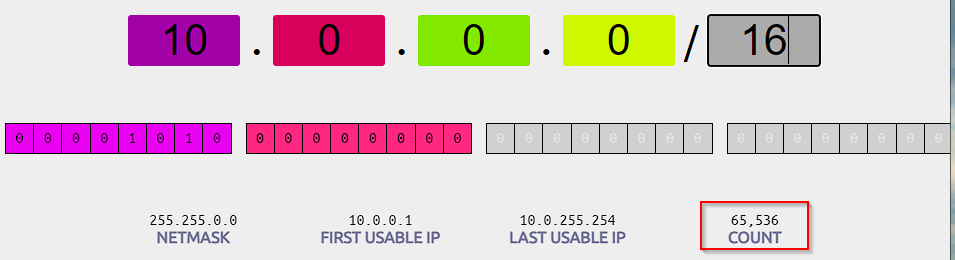
VPC_ID=$(aws ec2 create-vpc --cidr-block 10.0.0.0/16 --output text --query 'Vpc.VpcId')
aws ec2 create-tags --resources ${VPC_ID} --tags Key=Name,Value=kubernetes-from-scratch
aws ec2 modify-vpc-attribute --vpc-id ${VPC_ID} --enable-dns-support '{"Value": true}'
aws ec2 modify-vpc-attribute --vpc-id ${VPC_ID} --enable-dns-hostnames '{"Value": true}'
Private Subnet
We need to be able to assign private IP addresses to our compute instances for both the control plane controllers, as well as our worker instances. Subnets in our VPC allow us to create a range of IP addresses that we can allocate to our instances which do not allow external access (unless through a proxy or load balancer):
1
2
3
4
5
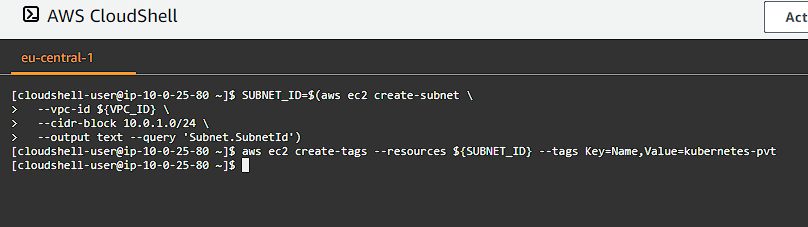
SUBNET_ID=$(aws ec2 create-subnet \
--vpc-id ${VPC_ID} \
--cidr-block 10.0.1.0/24 \
--output text --query 'Subnet.SubnetId')
aws ec2 create-tags --resources ${SUBNET_ID} --tags Key=Name,Value=kubernetes-pvt

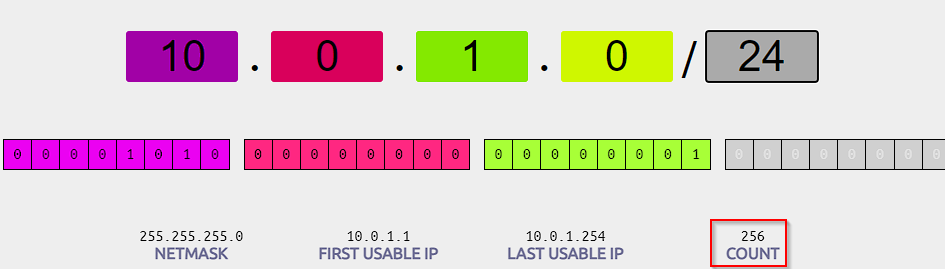
By using this CIDR range 10.0.1.0/24 we have up to 256 hosts (actually less due to AWS reserving some of the IPs, the first 4 and the last 1, read more here).
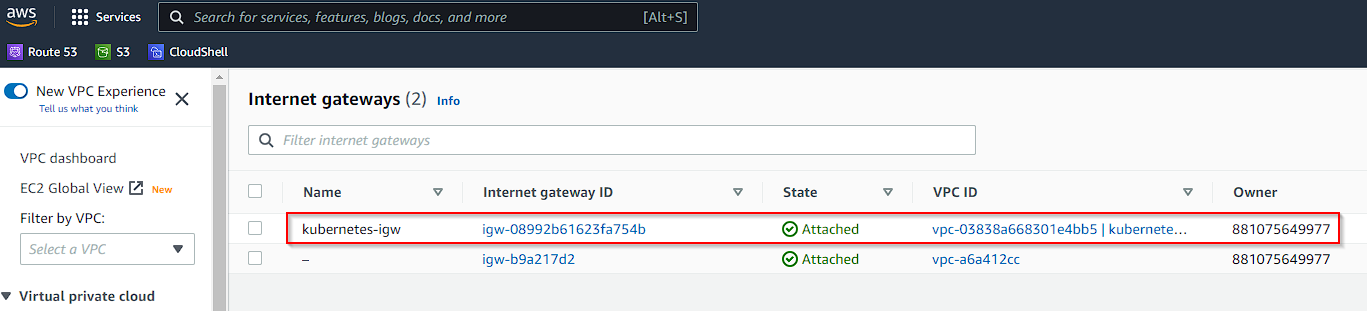
Internet Gateway
Our instances need some way to connect and communicate with the internet since we are on a private network. This means we need to provision a gateway we can use to proxy our traffic through. Let’s setup one by running the following commands:
1
2
3
INTERNET_GATEWAY_ID=$(aws ec2 create-internet-gateway --output text --query 'InternetGateway.InternetGatewayId')
aws ec2 create-tags --resources ${INTERNET_GATEWAY_ID} --tags Key=Name,Value=kubernetes-igw
aws ec2 attach-internet-gateway --internet-gateway-id ${INTERNET_GATEWAY_ID} --vpc-id ${VPC_ID}

Route Table
We need to now define how we want to route our traffic from our instances in our network through our Internet Gateway. To do that we define a routing table for the traffic:
1
2
3
4
ROUTE_TABLE_ID=$(aws ec2 create-route-table --vpc-id ${VPC_ID} --output text --query 'RouteTable.RouteTableId')
aws ec2 create-tags --resources ${ROUTE_TABLE_ID} --tags Key=Name,Value=kubernetes-rt
aws ec2 associate-route-table --route-table-id ${ROUTE_TABLE_ID} --subnet-id ${SUBNET_ID}
aws ec2 create-route --route-table-id ${ROUTE_TABLE_ID} --destination-cidr-block 0.0.0.0/0 --gateway-id ${INTERNET_GATEWAY_ID}
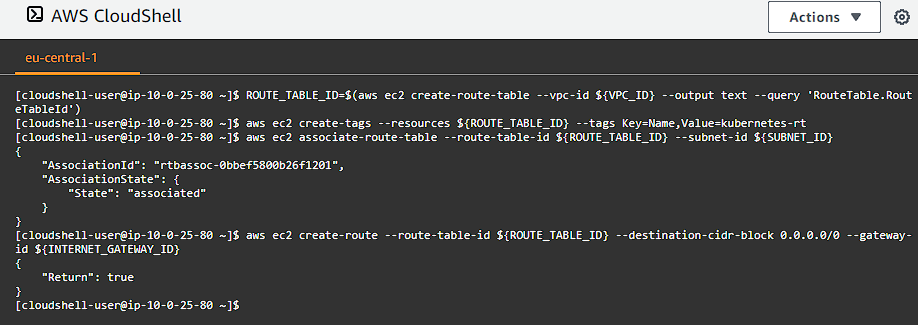
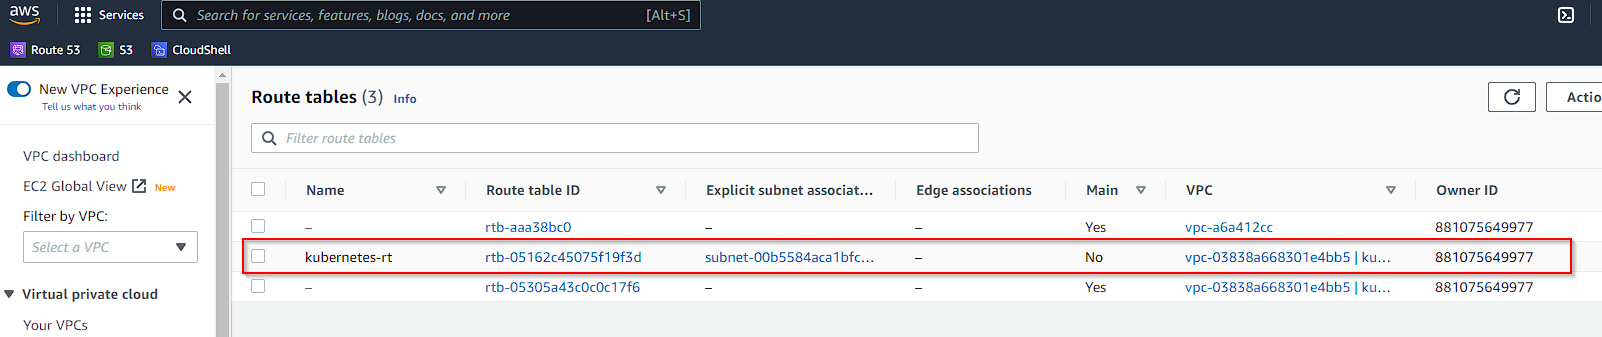
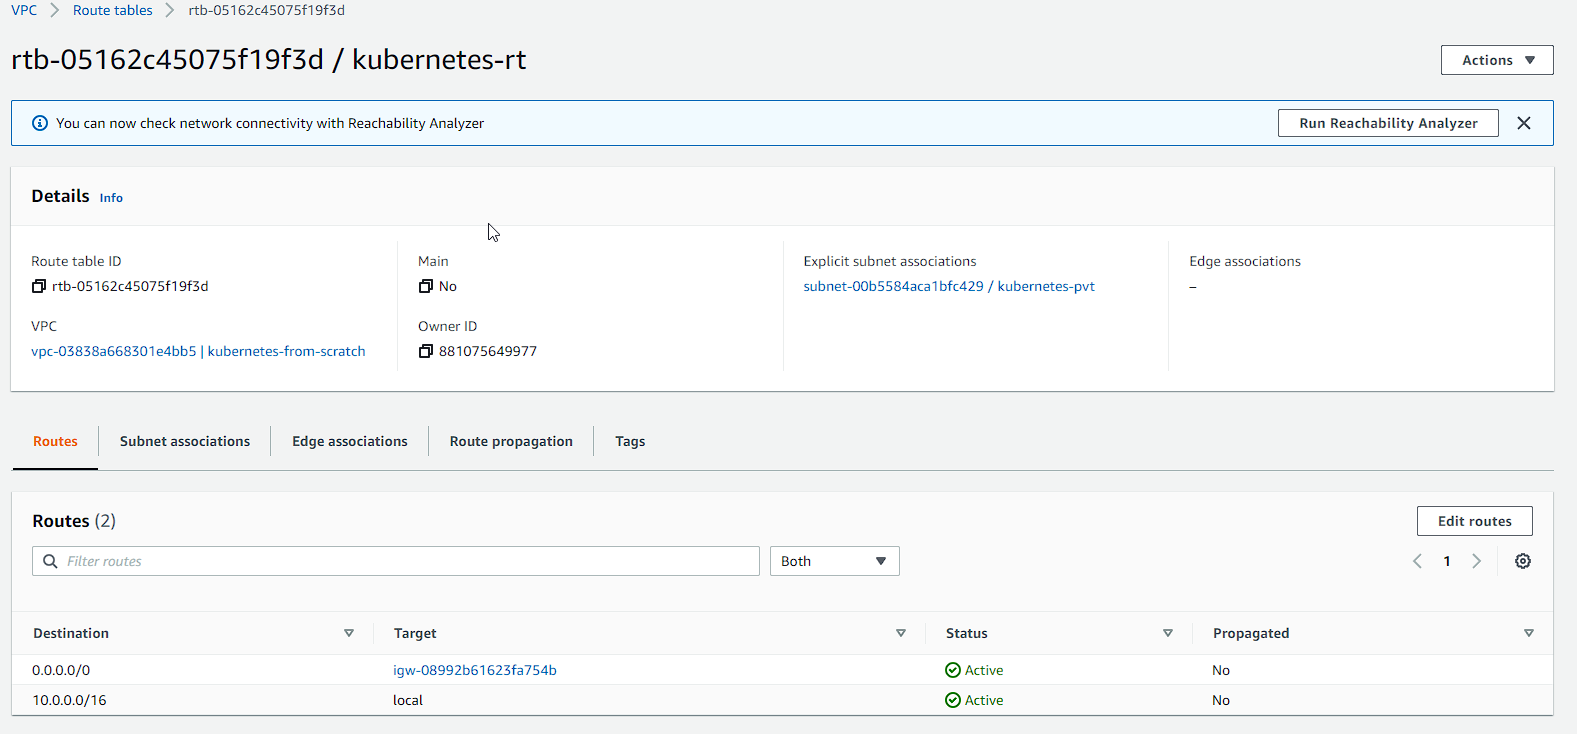
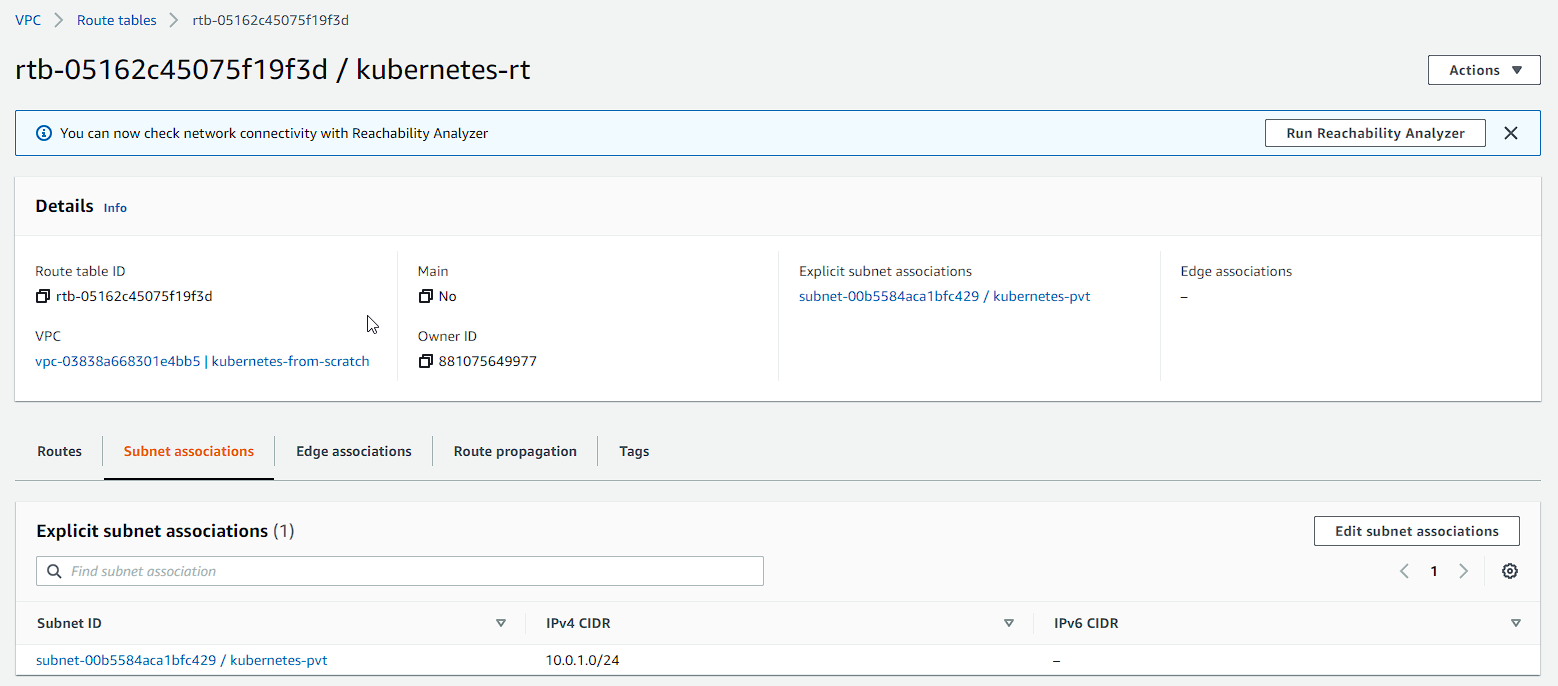
Our private subnet has now been associated with the Route Table and our routes have been setup for our Internet Gateway.
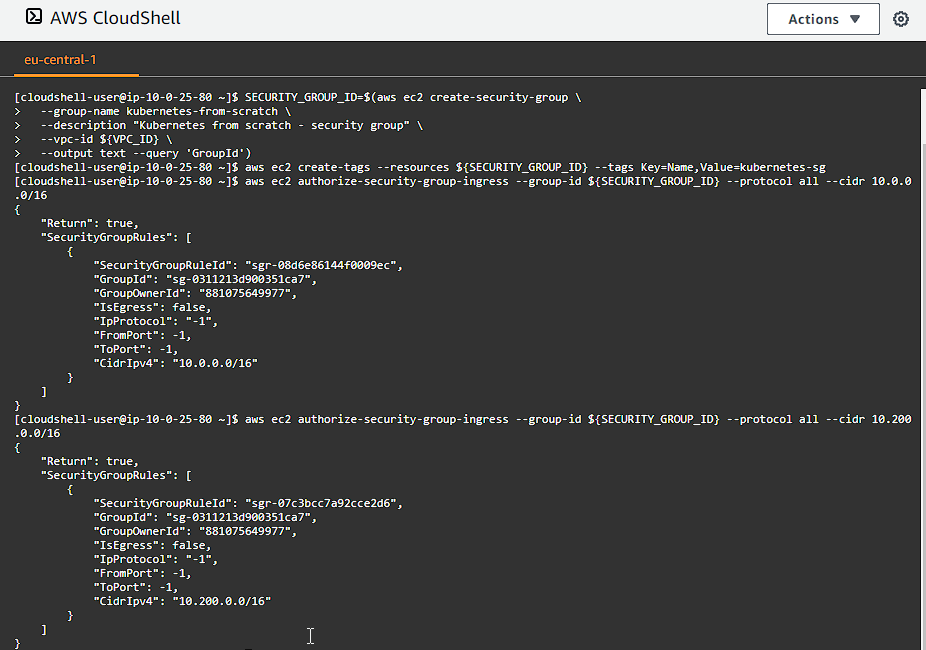
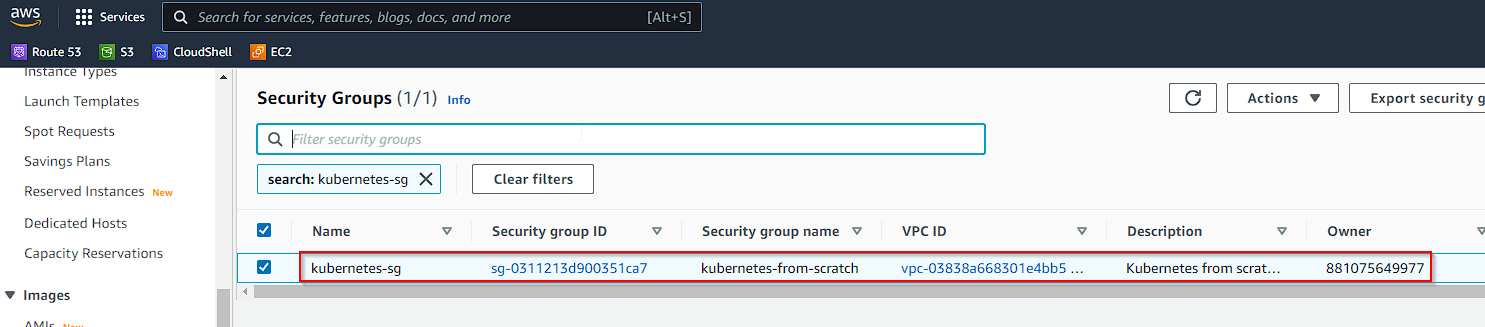
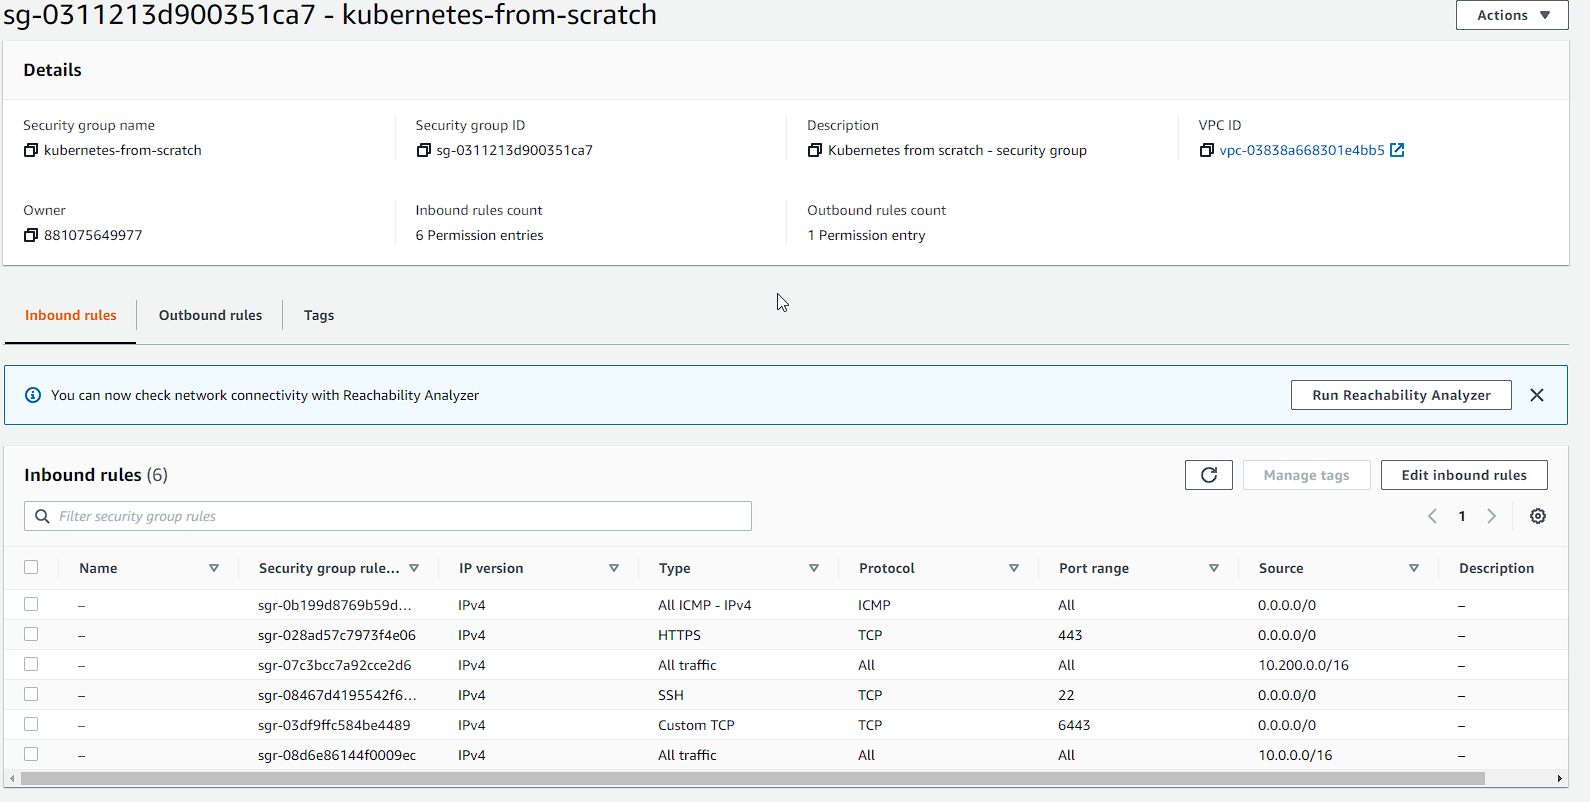
Security Group
We need a security group so that we can allow traffic between our instances, as well as access from our client software. We define rules for communication betweeen our controllers and our workers; SSH, Kubernetes API server, HTTPS and ICMP (for pings):
1
2
3
4
5
6
7
8
9
10
11
12
SECURITY_GROUP_ID=$(aws ec2 create-security-group \
--group-name kubernetes-from-scratch \
--description "Kubernetes from scratch - security group" \
--vpc-id ${VPC_ID} \
--output text --query 'GroupId')
aws ec2 create-tags --resources ${SECURITY_GROUP_ID} --tags Key=Name,Value=kubernetes-sg
aws ec2 authorize-security-group-ingress --group-id ${SECURITY_GROUP_ID} --protocol all --cidr 10.0.0.0/16
aws ec2 authorize-security-group-ingress --group-id ${SECURITY_GROUP_ID} --protocol all --cidr 10.200.0.0/16
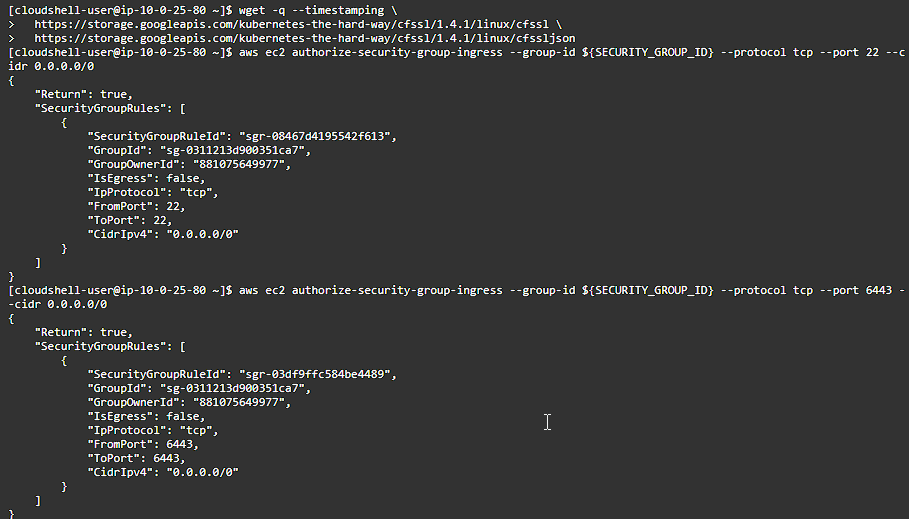
aws ec2 authorize-security-group-ingress --group-id ${SECURITY_GROUP_ID} --protocol tcp --port 22 --cidr 0.0.0.0/0
aws ec2 authorize-security-group-ingress --group-id ${SECURITY_GROUP_ID} --protocol tcp --port 6443 --cidr 0.0.0.0/0
aws ec2 authorize-security-group-ingress --group-id ${SECURITY_GROUP_ID} --protocol tcp --port 443 --cidr 0.0.0.0/0
aws ec2 authorize-security-group-ingress --group-id ${SECURITY_GROUP_ID} --protocol icmp --port -1 --cidr 0.0.0.0/0

Network Load Balancer
We need some way for us to access our Kubernetes API from the outside world . We create an Internet-facing Network Load Balancer and register our control plane controllers. This way we can have an HA (Highly Available) control plane. To create our load balancer execute the following:
1
2
3
4
5
6
7
8
9
10
11
12
13
14
15
16
17
18
19
20
LOAD_BALANCER_ARN=$(aws elbv2 create-load-balancer \
    --name kubernetes-nlb \
    --subnets ${SUBNET_ID} \
    --scheme internet-facing \
    --type network \
    --output text --query 'LoadBalancers[].LoadBalancerArn')
TARGET_GROUP_ARN=$(aws elbv2 create-target-group \
    --name kubernetes-tg \
    --protocol TCP \
    --port 6443 \
    --vpc-id ${VPC_ID} \
    --target-type ip \
    --output text --query 'TargetGroups[].TargetGroupArn')
aws elbv2 register-targets --target-group-arn ${TARGET_GROUP_ARN} --targets Id=10.0.1.1{0,1,2}
aws elbv2 create-listener \
    --load-balancer-arn ${LOAD_BALANCER_ARN} \
    --protocol TCP \
    --port 443 \
    --default-actions Type=forward,TargetGroupArn=${TARGET_GROUP_ARN} \
    --output text --query 'Listeners[].ListenerArn'

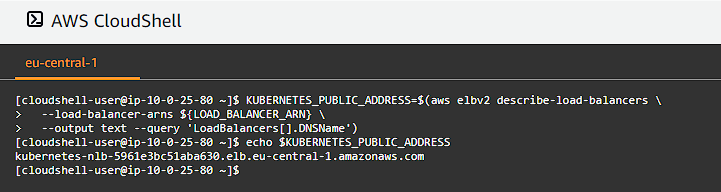
We can get our public DNS address of our load balancer for use later on:
1
2
3
KUBERNETES_PUBLIC_ADDRESS=$(aws elbv2 describe-load-balancers \
  --load-balancer-arns ${LOAD_BALANCER_ARN} \
  --output text --query 'LoadBalancers[].DNSName')
Compute Instances
Now that we have setup all of our routing and supporting infrastructure, it has now come time to define our work horses (controllers and workers). We are going to be using Ubuntu 20.04 for our compute instances, so we will need to select that first:
1
2
3
4
5
6
7
IMAGE_ID=$(aws ec2 describe-images --owners 099720109477 \
  --output json \
  --filters \
  'Name=root-device-type,Values=ebs' \
  'Name=architecture,Values=x86_64' \
  'Name=name,Values=ubuntu/images/hvm-ssd/ubuntu-focal-20.04-amd64-server-*' \
  | jq -r '.Images|sort_by(.Name)[-1]|.ImageId')
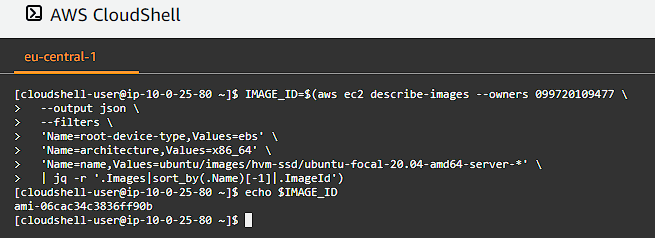
This will get the IMAGE_ID in our region for the Ubuntu 20.04 OS that we will be running on our nodes.
We need to connect to our nodes so we can install software and manage the systems, so we need to create a key-pair so we can use it to securely connect to our instances. Let’s create our new key-pair:
1
2
aws ec2 create-key-pair --key-name kubernetes --output text --query 'KeyMaterial' > kubernetes.id_rsa
chmod 600 kubernetes.id_rsa
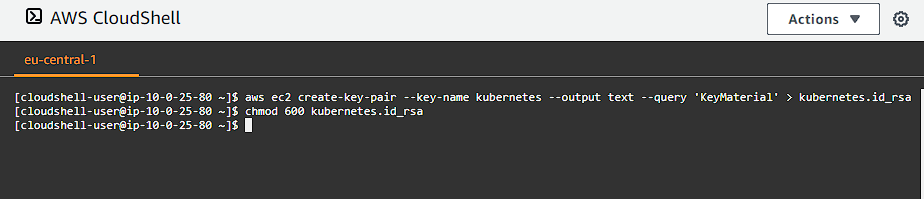
Remember to save this file somewhere safe like in a keychain or something like Bitwarden.
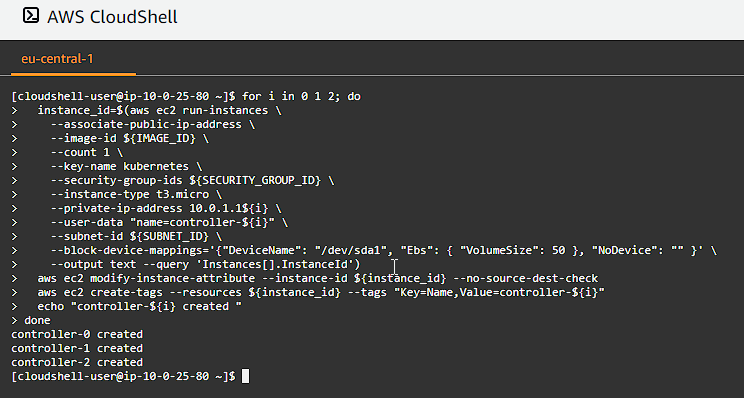
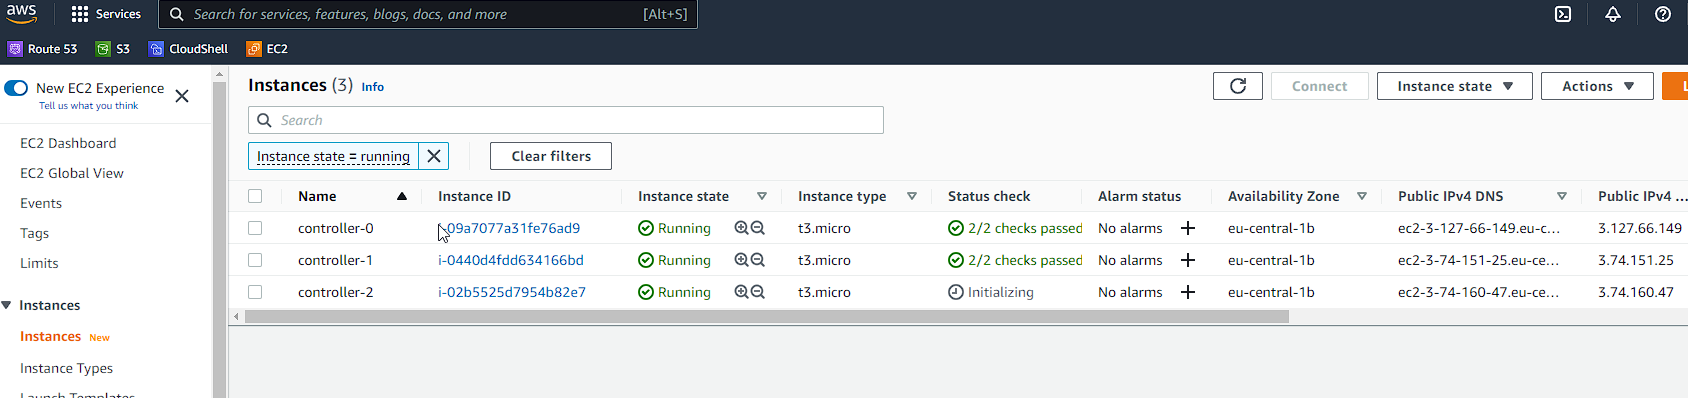
Next, let’s provision our Kubernetes controllers. We going to require 3 for HA (High Availability), and we will be using t3.micro instances in this step (feel free to experiment with different instance types, but bear in mind they do cost you money):
1
2
3
4
5
6
7
8
9
10
11
12
13
14
15
16
17
for i in 0 1 2; do
  instance_id=$(aws ec2 run-instances \
    --associate-public-ip-address \
    --image-id ${IMAGE_ID} \
    --count 1 \
    --key-name kubernetes \
    --security-group-ids ${SECURITY_GROUP_ID} \
    --instance-type t3.micro \
    --private-ip-address 10.0.1.1${i} \
    --user-data "name=controller-${i}" \
    --subnet-id ${SUBNET_ID} \
    --block-device-mappings='{"DeviceName": "/dev/sda1", "Ebs": { "VolumeSize": 50 }, "NoDevice": "" }' \
    --output text --query 'Instances[].InstanceId')
  aws ec2 modify-instance-attribute --instance-id ${instance_id} --no-source-dest-check
  aws ec2 create-tags --resources ${instance_id} --tags "Key=Name,Value=controller-${i}"
  echo "controller-${i} created "
done
Take special note of the key-name if you have named it different to what we have in the previous steps. We associate a public ip address as well to the instances.
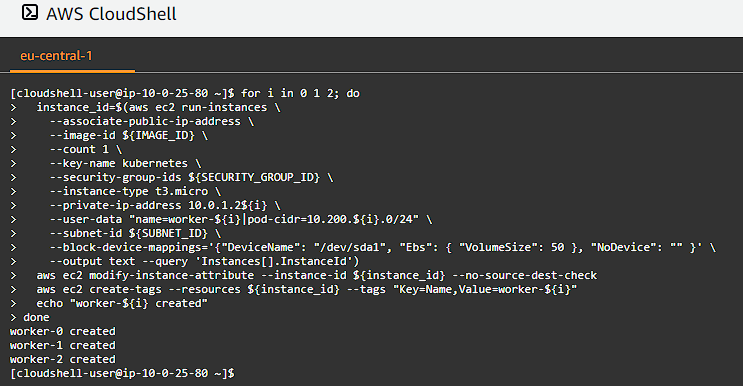
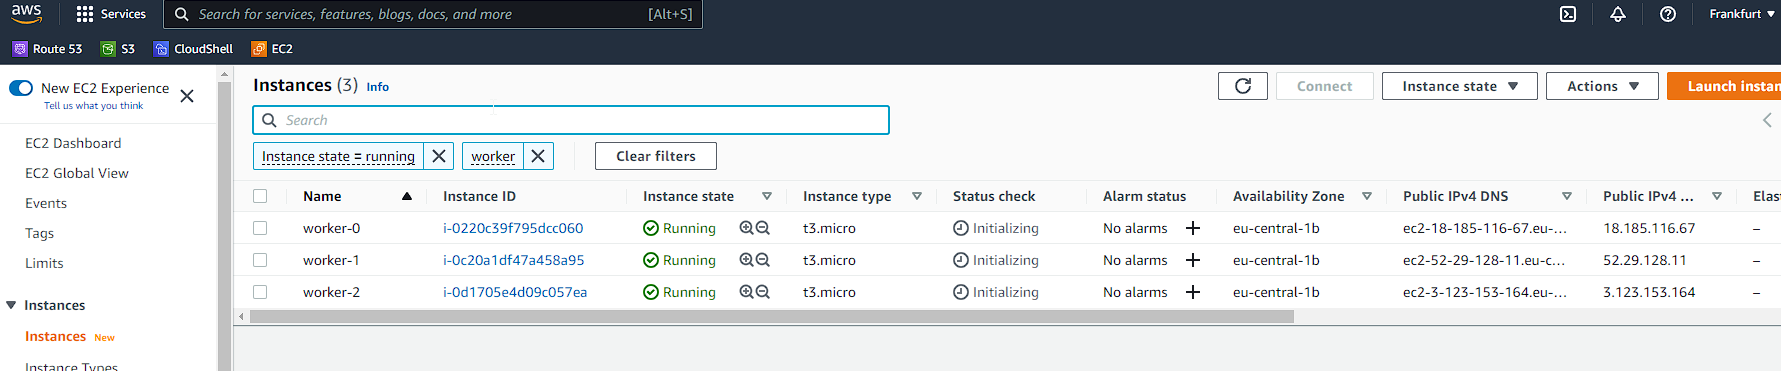
Now it is time to create the worker nodes:
1
2
3
4
5
6
7
8
9
10
11
12
13
14
15
16
17
for i in 0 1 2; do
  instance_id=$(aws ec2 run-instances \
    --associate-public-ip-address \
    --image-id ${IMAGE_ID} \
    --count 1 \
    --key-name kubernetes \
    --security-group-ids ${SECURITY_GROUP_ID} \
    --instance-type t3.micro \
    --private-ip-address 10.0.1.2${i} \
    --user-data "name=worker-${i}|pod-cidr=10.200.${i}.0/24" \
    --subnet-id ${SUBNET_ID} \
    --block-device-mappings='{"DeviceName": "/dev/sda1", "Ebs": { "VolumeSize": 50 }, "NoDevice": "" }' \
    --output text --query 'Instances[].InstanceId')
  aws ec2 modify-instance-attribute --instance-id ${instance_id} --no-source-dest-check
  aws ec2 create-tags --resources ${instance_id} --tags "Key=Name,Value=worker-${i}"
  echo "worker-${i} created"
done
And just like that we have our infrastructure in place, we now need to move on and install the necessary software and configuration on each node.
Provisioning a CA and Generating TLS Certificates
Security is extremely important, and by using TLS Certificates we ensure that communication between the nodes in the system is secure.
Let us proceed to create a folder called certs and then enter the folder:
1
2
mkdir -p certs
cd certs/
Certificate Authority
1
2
3
4
5
6
7
8
9
10
11
12
13
14
15
16
17
18
19
20
21
22
23
24
25
26
27
28
29
30
31
32
33
34
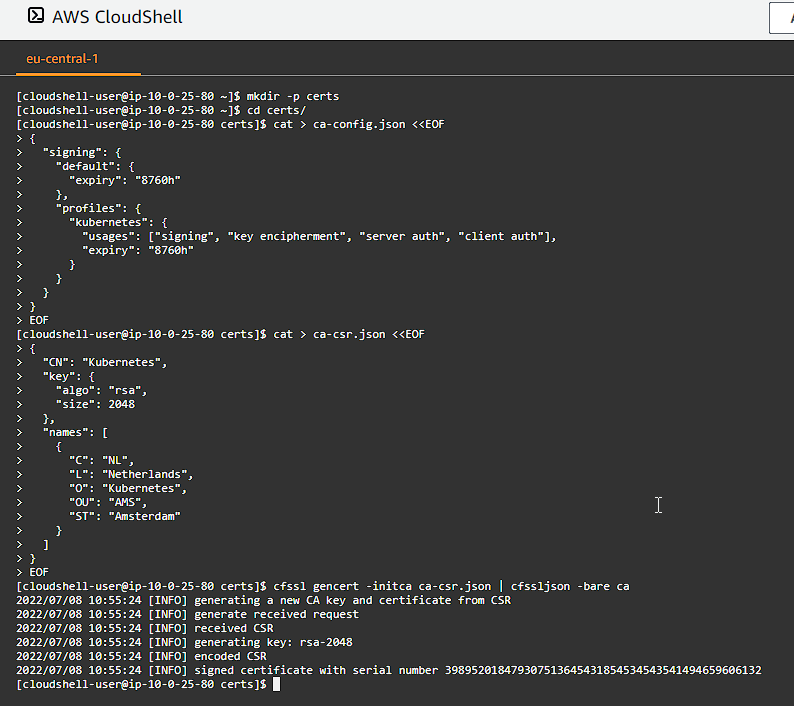
cat > ca-config.json <<EOF
{
"signing": {
"default": {
"expiry": "8760h"
},
"profiles": {
"kubernetes": {
"usages": ["signing", "key encipherment", "server auth", "client auth"],
"expiry": "8760h"
}
}
}
}
EOF
cat > ca-csr.json <<EOF
{
"CN": "Kubernetes",
"key": {
"algo": "rsa",
"size": 2048
},
"names": [
{
"C": "NL",
"L": "Netherlands",
"O": "Kubernetes",
"OU": "AMS",
"ST": "Amsterdam"
}
]
}
EOF
cfssl gencert -initca ca-csr.json | cfssljson -bare ca
Client and Server Certificates
We need to generate client and server certificates for each Kubernetes component and a client certificate for the Kubernetes admin user.
The Admin Client Certificate
Generate the admin client certificate and private key:
1
2
3
4
5
6
7
8
9
10
11
12
13
14
15
16
17
18
19
20
21
22
23
24
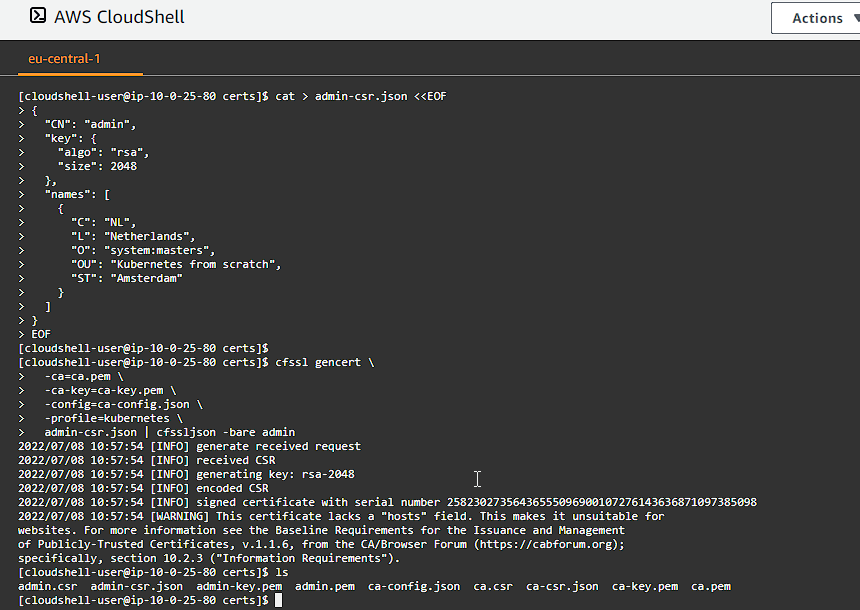
cat > admin-csr.json <<EOF
{
"CN": "admin",
"key": {
"algo": "rsa",
"size": 2048
},
"names": [
{
"C": "NL",
"L": "Netherlands",
"O": "system:masters",
"OU": "Kubernetes from scratch",
"ST": "Amsterdam"
}
]
}
EOF
cfssl gencert \
-ca=ca.pem \
-ca-key=ca-key.pem \
-config=ca-config.json \
-profile=kubernetes \
admin-csr.json | cfssljson -bare admin
The Kubelet Client Certificates
Kubernetes uses a special-purpose authorization mode called Node Authorizer, that specifically authorizes API requests made by Kubelets. In order to be authorized by the Node Authorizer, Kubelets must use a credential that identifies them as being in the system:nodes group, with a username of system:node:<nodeName>. In this section you will create a certificate for each Kubernetes worker node that meets the Node Authorizer requirements.
Generate a certificate and private key for each Kubernetes worker node:
1
2
3
4
5
6
7
8
9
10
11
12
13
14
15
16
17
18
19
20
21
22
23
24
25
26
27
28
29
30
31
32
33
34
35
36
37
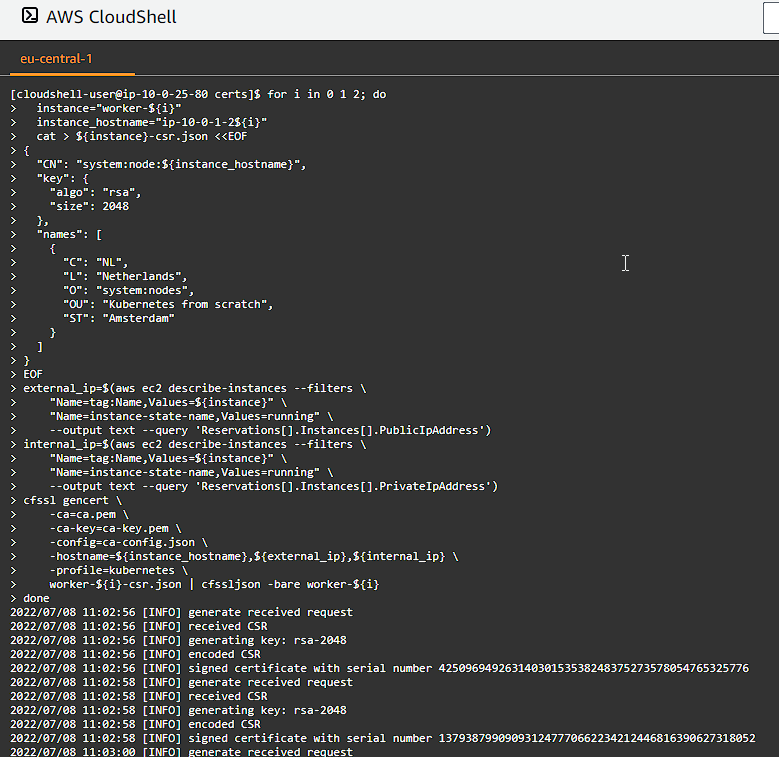
for i in 0 1 2; do
instance="worker-${i}"
instance_hostname="ip-10-0-1-2${i}"
cat > ${instance}-csr.json <<EOF
{
"CN": "system:node:${instance_hostname}",
"key": {
"algo": "rsa",
"size": 2048
},
"names": [
{
"C": "NL",
"L": "Netherlands",
"O": "system:nodes",
"OU": "Kubernetes from scratch",
"ST": "Amsterdam"
}
]
}
EOF
external_ip=$(aws ec2 describe-instances --filters \
"Name=tag:Name,Values=${instance}" \
"Name=instance-state-name,Values=running" \
--output text --query 'Reservations[].Instances[].PublicIpAddress')
internal_ip=$(aws ec2 describe-instances --filters \
"Name=tag:Name,Values=${instance}" \
"Name=instance-state-name,Values=running" \
--output text --query 'Reservations[].Instances[].PrivateIpAddress')
cfssl gencert \
-ca=ca.pem \
-ca-key=ca-key.pem \
-config=ca-config.json \
-hostname=${instance_hostname},${external_ip},${internal_ip} \
-profile=kubernetes \
worker-${i}-csr.json | cfssljson -bare worker-${i}
done

The Controller Manager Client Certificate
Generate the kube-controller-manager client certificate and private key:
1
2
3
4
5
6
7
8
9
10
11
12
13
14
15
16
17
18
19
20
21
22
23
24
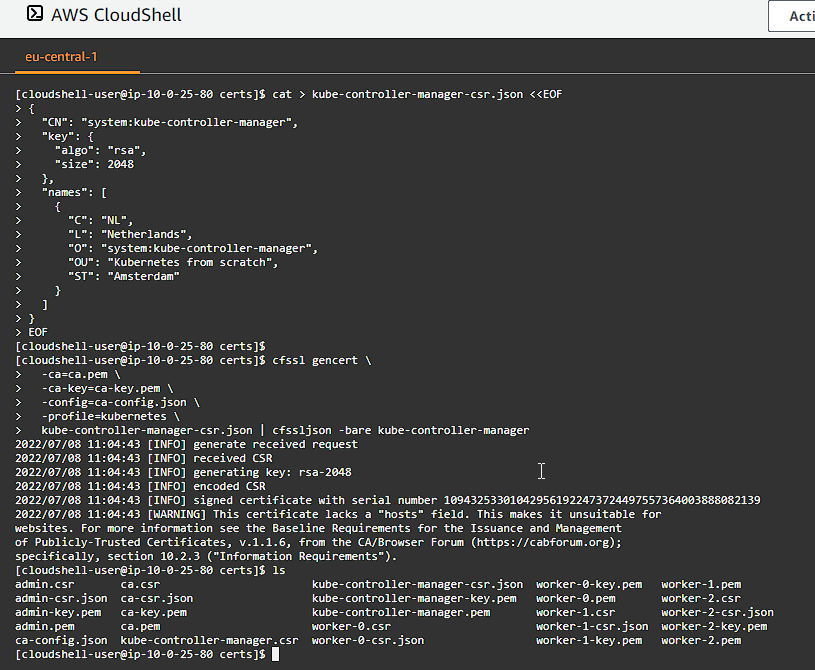
cat > kube-controller-manager-csr.json <<EOF
{
"CN": "system:kube-controller-manager",
"key": {
"algo": "rsa",
"size": 2048
},
"names": [
{
"C": "NL",
"L": "Netherlands",
"O": "system:kube-controller-manager",
"OU": "Kubernetes from scratch",
"ST": "Amsterdam"
}
]
}
EOF
cfssl gencert \
-ca=ca.pem \
-ca-key=ca-key.pem \
-config=ca-config.json \
-profile=kubernetes \
kube-controller-manager-csr.json | cfssljson -bare kube-controller-manager
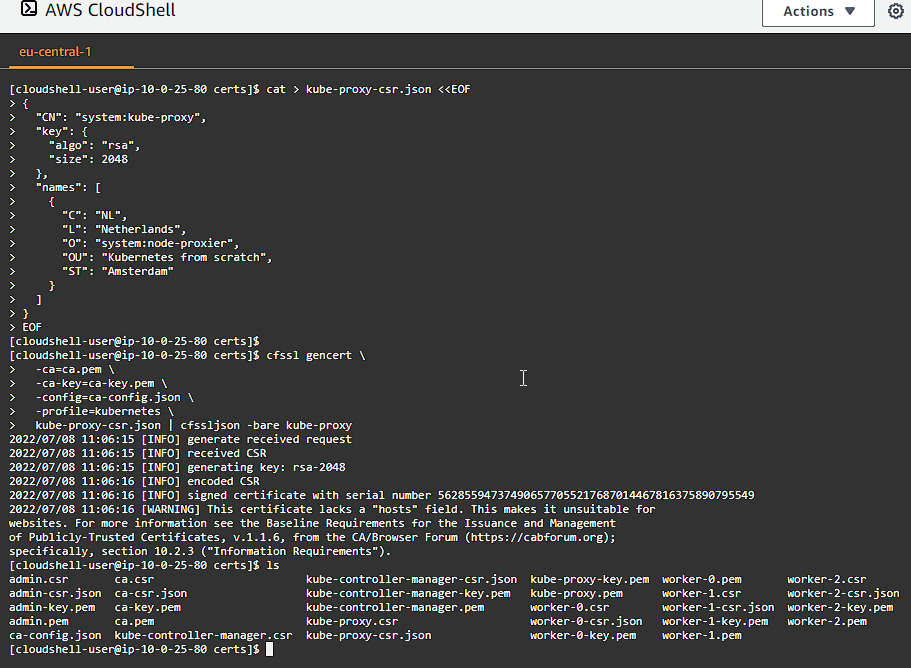
The Kube Proxy Client Certificate
Generate the kube-proxy client certificate and private key:
1
2
3
4
5
6
7
8
9
10
11
12
13
14
15
16
17
18
19
20
21
22
23
24
cat > kube-proxy-csr.json <<EOF
{
  "CN": "system:kube-proxy",
  "key": {
    "algo": "rsa",
    "size": 2048
  },
  "names": [
    {
      "C": "NL",
      "L": "Netherlands",
      "O": "system:node-proxier",
      "OU": "Kubernetes from scratch",
      "ST": "Amsterdam"
    }
  ]
}
EOF
cfssl gencert \
  -ca=ca.pem \
  -ca-key=ca-key.pem \
  -config=ca-config.json \
  -profile=kubernetes \
  kube-proxy-csr.json | cfssljson -bare kube-proxy
The Scheduler Client Certificate
Generate the kube-scheduler client certificate and private key:
1
2
3
4
5
6
7
8
9
10
11
12
13
14
15
16
17
18
19
20
21
22
23
24
cat > kube-scheduler-csr.json <<EOF
{
  "CN": "system:kube-scheduler",
  "key": {
    "algo": "rsa",
    "size": 2048
  },
  "names": [
    {
      "C": "NL",
      "L": "Netherlands",
      "O": "system:kube-scheduler",
      "OU": "Kubernetes from scratch",
      "ST": "Amsterdam"
    }
  ]
}
EOF
cfssl gencert \
  -ca=ca.pem \
  -ca-key=ca-key.pem \
  -config=ca-config.json \
  -profile=kubernetes \
  kube-scheduler-csr.json | cfssljson -bare kube-scheduler
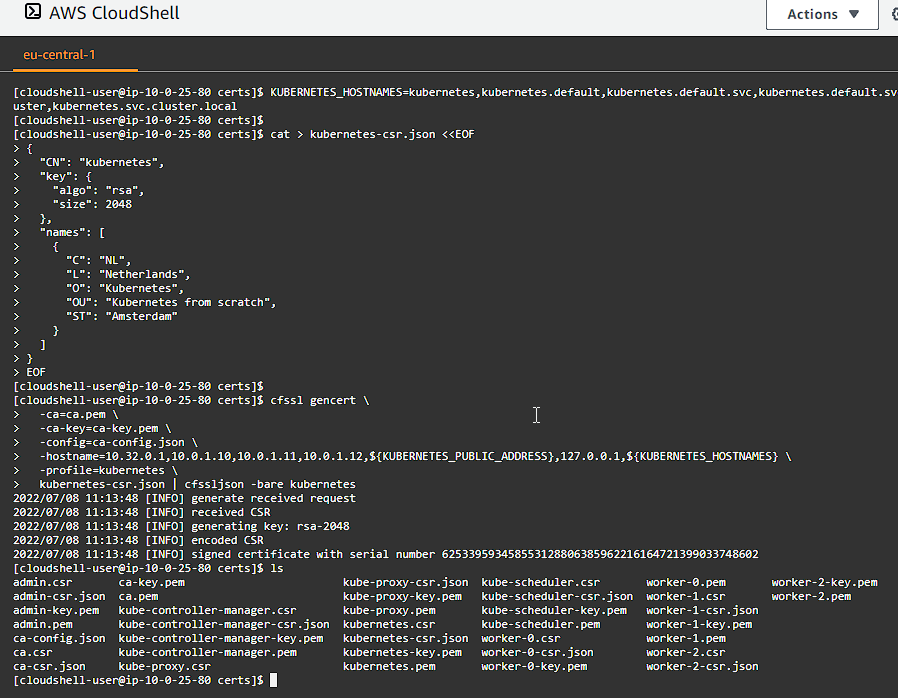
The Kubernetes API Server Certificate
The Kubernetes Public Address will be included in the list of subject alternative names for the Kubernetes API Server certificate. This will encure the certificate can be validated by remote clients.
Generate the Kubernetes API Server certificate and private key:
1
2
3
4
5
6
7
8
9
10
11
12
13
14
15
16
17
18
19
20
21
22
23
24
25
26
KUBERNETES_HOSTNAMES=kubernetes,kubernetes.default,kubernetes.default.svc,kubernetes.default.svc.cluster,kubernetes.svc.cluster.local
cat > kubernetes-csr.json <<EOF
{
  "CN": "kubernetes",
  "key": {
    "algo": "rsa",
    "size": 2048
  },
  "names": [
    {
      "C": "NL",
      "L": "Netherlands",
      "O": "Kubernetes",
      "OU": "Kubernetes from scratch",
      "ST": "Amsterdam"
    }
  ]
}
EOF
cfssl gencert \
  -ca=ca.pem \
  -ca-key=ca-key.pem \
  -config=ca-config.json \
  -hostname=10.32.0.1,10.0.1.10,10.0.1.11,10.0.1.12,${KUBERNETES_PUBLIC_ADDRESS},127.0.0.1,${KUBERNETES_HOSTNAMES} \
  -profile=kubernetes \
  kubernetes-csr.json | cfssljson -bare kubernetes
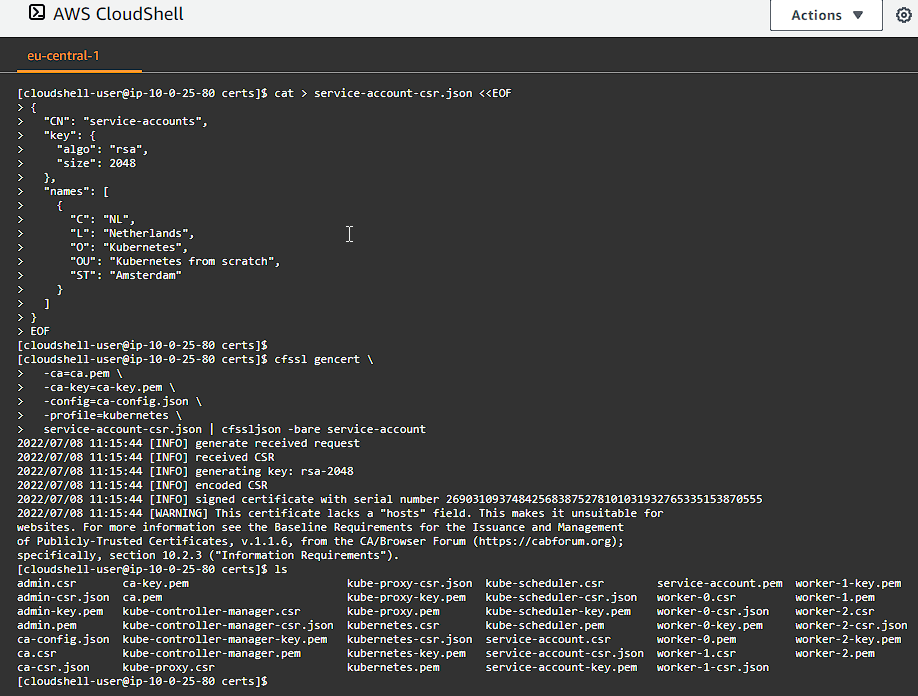
The Service Account Key Pair
The Kubernetes Controller Manager leverages a key pair to generate and sign service account tokens as described in the managing service accounts documentation.
Generate the service-account certificate and private key:
1
2
3
4
5
6
7
8
9
10
11
12
13
14
15
16
17
18
19
20
21
22
23
24
cat > service-account-csr.json <<EOF
{
  "CN": "service-accounts",
  "key": {
    "algo": "rsa",
    "size": 2048
  },
  "names": [
    {
      "C": "NL",
      "L": "Netherlands",
      "O": "Kubernetes",
      "OU": "Kubernetes from scratch",
      "ST": "Amsterdam"
    }
  ]
}
EOF
cfssl gencert \
  -ca=ca.pem \
  -ca-key=ca-key.pem \
  -config=ca-config.json \
  -profile=kubernetes \
  service-account-csr.json | cfssljson -bare service-account
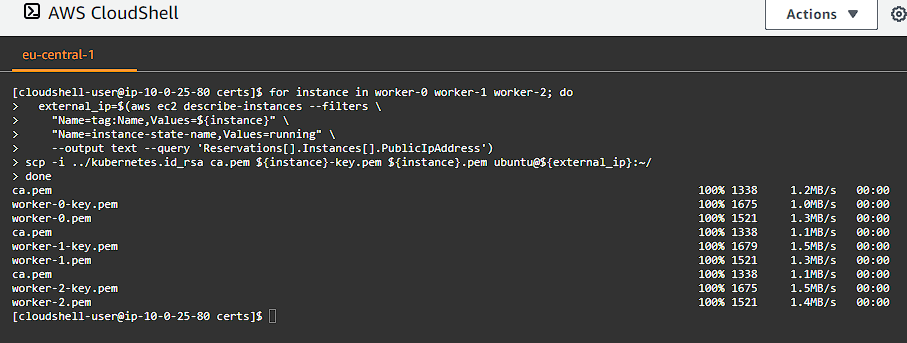
Distribute the Client and Server Certificates
Now that we have this directory full of certificates, its time to send them to the nodes.
First we will copy the certificates and private keys to each worker instance:
1
2
3
4
5
6
7
for instance in worker-0 worker-1 worker-2; do
  external_ip=$(aws ec2 describe-instances --filters \
    "Name=tag:Name,Values=${instance}" \
    "Name=instance-state-name,Values=running" \
    --output text --query 'Reservations[].Instances[].PublicIpAddress')
scp -i ../kubernetes.id_rsa ca.pem ${instance}-key.pem ${instance}.pem ubuntu@${external_ip}:~/
done
Take note, we are in the certs/ folder, so to I added the ../kubernetes.id_rsa — which is one directory up from where we were in case you are getting permission denied errors.
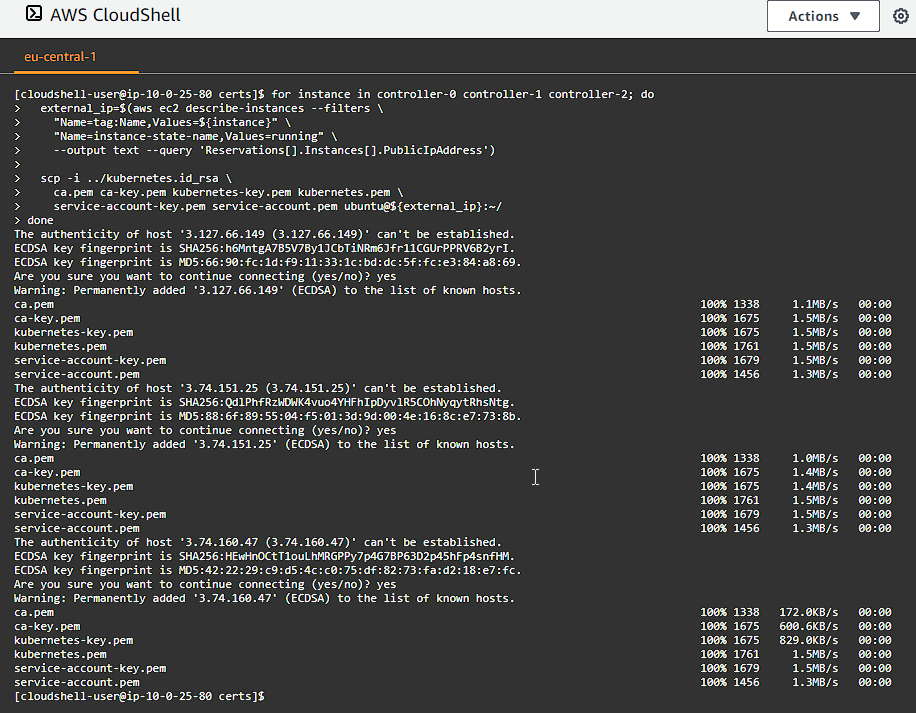
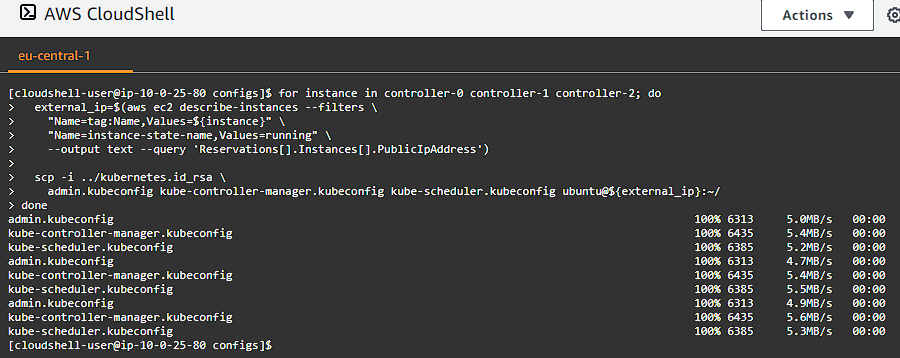
Next we copy the certificates and private keys to each controller instance:
1
2
3
4
5
6
7
8
9
for instance in controller-0 controller-1 controller-2; do
  external_ip=$(aws ec2 describe-instances --filters \
    "Name=tag:Name,Values=${instance}" \
    "Name=instance-state-name,Values=running" \
    --output text --query 'Reservations[].Instances[].PublicIpAddress')
scp -i ../kubernetes.id_rsa \
    ca.pem ca-key.pem kubernetes-key.pem kubernetes.pem \
    service-account-key.pem service-account.pem ubuntu@${external_ip}:~/
done
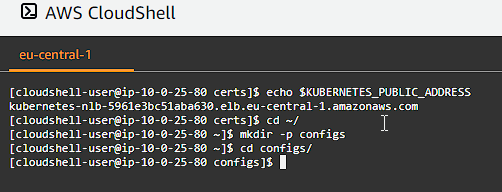
Generating Kubernetes Configuration Files for Authentication
We need to generate some kubeconfigs — Kubernetes configuration files — which enable Kubernetes clients to locate and authenticate to the Kubernetes API Servers.
For this we will go back to our home folder and create a folder called configs and then change into that folder:
1
2
3
cd ~/
mkdir -p configs
cd configs/
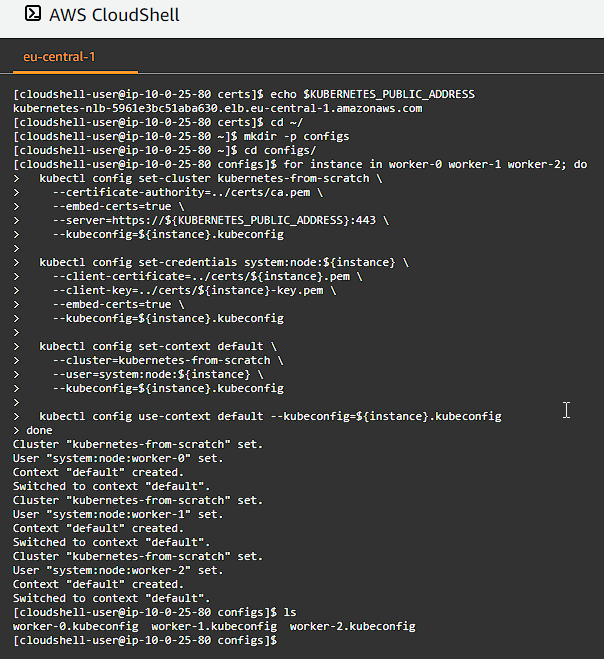
The kubelet Configuration File
Generate a kubeconfig for each worker node:
1
2
3
4
5
6
7
8
9
10
11
12
13
14
15
16
17
for instance in worker-0 worker-1 worker-2; do
  kubectl config set-cluster kubernetes-from-scratch \
    --certificate-authority=../certs/ca.pem \
    --embed-certs=true \
    --server=https://${KUBERNETES_PUBLIC_ADDRESS}:443 \
    --kubeconfig=${instance}.kubeconfig
kubectl config set-credentials system:node:${instance} \
    --client-certificate=../certs/${instance}.pem \
    --client-key=../certs/${instance}-key.pem \
    --embed-certs=true \
    --kubeconfig=${instance}.kubeconfig
kubectl config set-context default \
    --cluster=kubernetes-from-scratch \
    --user=system:node:${instance} \
    --kubeconfig=${instance}.kubeconfig
kubectl config use-context default --kubeconfig=${instance}.kubeconfig
done
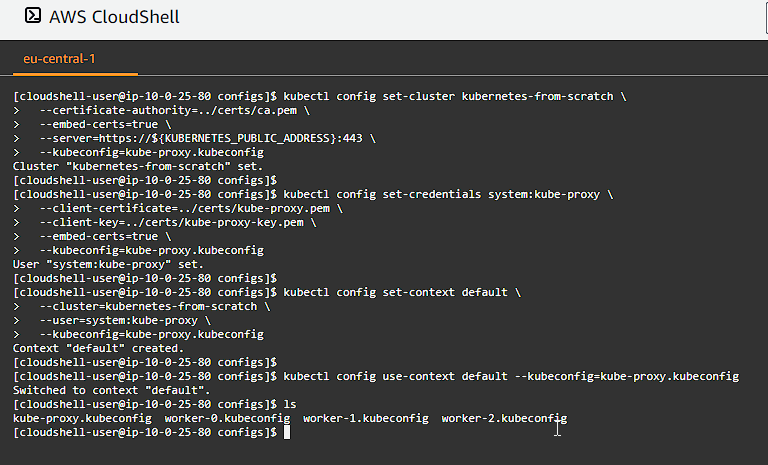
The kube-proxy Kubernets Configuration File
Generate a kubeconfig file for the kube-proxy service:
1
2
3
4
5
6
7
8
9
10
11
12
13
14
15
kubectl config set-cluster kubernetes-from-scratch \
  --certificate-authority=../certs/ca.pem \
  --embed-certs=true \
  --server=https://${KUBERNETES_PUBLIC_ADDRESS}:443 \
  --kubeconfig=kube-proxy.kubeconfig
kubectl config set-credentials system:kube-proxy \
  --client-certificate=../certs/kube-proxy.pem \
  --client-key=../certs/kube-proxy-key.pem \
  --embed-certs=true \
  --kubeconfig=kube-proxy.kubeconfig
kubectl config set-context default \
  --cluster=kubernetes-from-scratch \
  --user=system:kube-proxy \
  --kubeconfig=kube-proxy.kubeconfig
kubectl config use-context default --kubeconfig=kube-proxy.kubeconfig
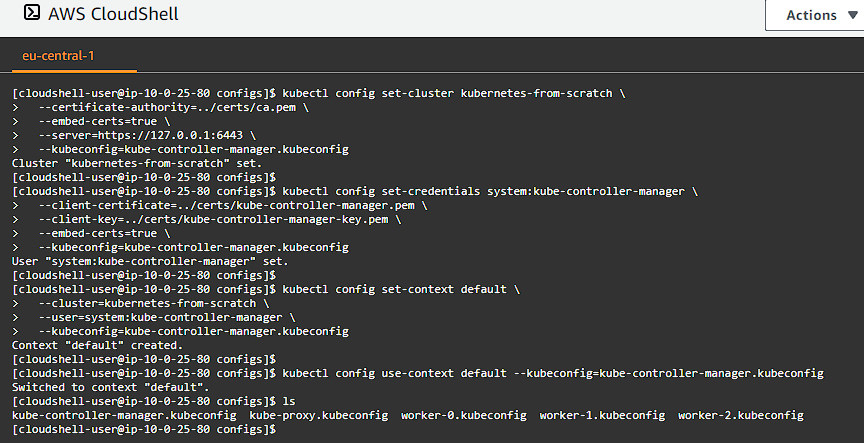
The kube-controller-manager Kubernetes Configuration File
Generate a kubeconfig file for the kube-controller-manager service:
1
2
3
4
5
6
7
8
9
10
11
12
13
14
15
kubectl config set-cluster kubernetes-from-scratch \
  --certificate-authority=../certs/ca.pem \
  --embed-certs=true \
  --server=https://127.0.0.1:6443 \
  --kubeconfig=kube-controller-manager.kubeconfig
kubectl config set-credentials system:kube-controller-manager \
  --client-certificate=../certs/kube-controller-manager.pem \
  --client-key=../certs/kube-controller-manager-key.pem \
  --embed-certs=true \
  --kubeconfig=kube-controller-manager.kubeconfig
kubectl config set-context default \
  --cluster=kubernetes-from-scratch \
  --user=system:kube-controller-manager \
  --kubeconfig=kube-controller-manager.kubeconfig
kubectl config use-context default --kubeconfig=kube-controller-manager.kubeconfig
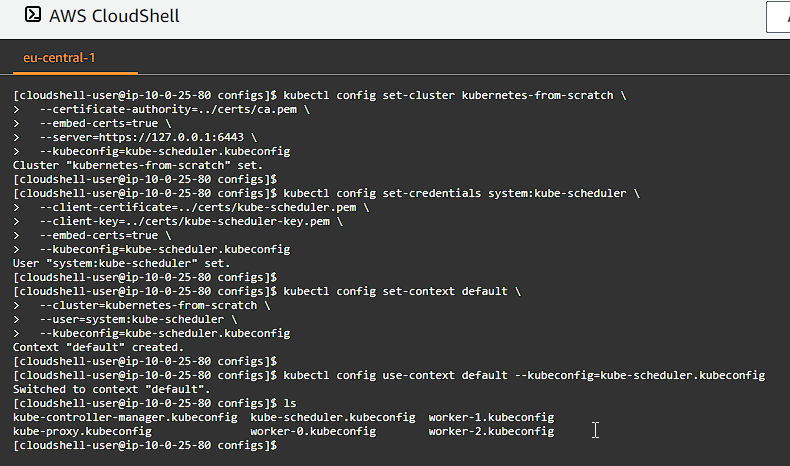
The kube-scheduler Kubernetes Configuration File
Generate a kubeconfig file for the kube-scheduler service:
1
2
3
4
5
6
7
8
9
10
11
12
13
14
15
kubectl config set-cluster kubernetes-from-scratch \
  --certificate-authority=../certs/ca.pem \
  --embed-certs=true \
  --server=https://127.0.0.1:6443 \
  --kubeconfig=kube-scheduler.kubeconfig
kubectl config set-credentials system:kube-scheduler \
  --client-certificate=../certs/kube-scheduler.pem \
  --client-key=../certs/kube-scheduler-key.pem \
  --embed-certs=true \
  --kubeconfig=kube-scheduler.kubeconfig
kubectl config set-context default \
  --cluster=kubernetes-from-scratch \
  --user=system:kube-scheduler \
  --kubeconfig=kube-scheduler.kubeconfig
kubectl config use-context default --kubeconfig=kube-scheduler.kubeconfig
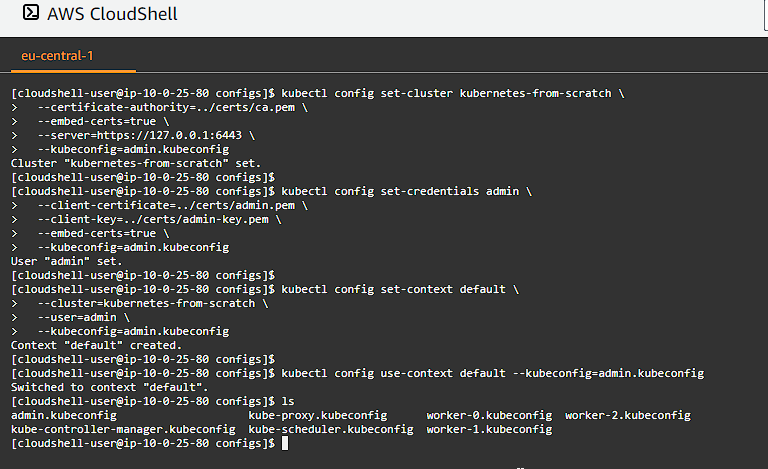
The admin Kubernetes Configuration File
Generate a kubeconfig file for the admin user:
1
2
3
4
5
6
7
8
9
10
11
12
13
14
15
kubectl config set-cluster kubernetes-from-scratch \
  --certificate-authority=../certs/ca.pem \
  --embed-certs=true \
  --server=https://127.0.0.1:6443 \
  --kubeconfig=admin.kubeconfig
kubectl config set-credentials admin \
  --client-certificate=../certs/admin.pem \
  --client-key=../certs/admin-key.pem \
  --embed-certs=true \
  --kubeconfig=admin.kubeconfig
kubectl config set-context default \
  --cluster=kubernetes-from-scratch \
  --user=admin \
  --kubeconfig=admin.kubeconfig
kubectl config use-context default --kubeconfig=admin.kubeconfig
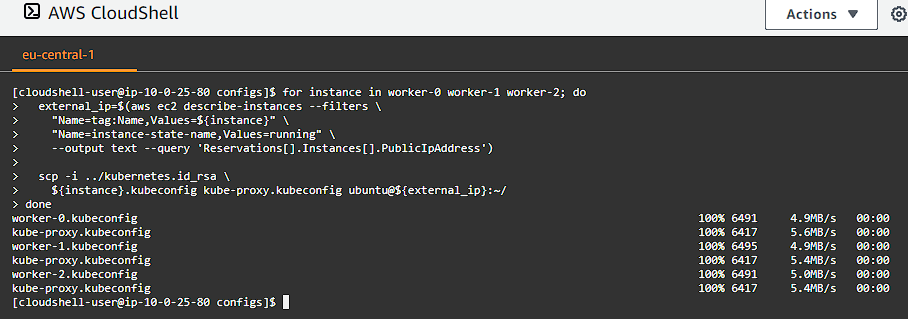
Distribute the Kubernetes Configuration Files
Copy the kubelet and kube-proxy kubeconfig files to each worker instance:
1
2
3
4
5
6
7
8
for instance in worker-0 worker-1 worker-2; do
  external_ip=$(aws ec2 describe-instances --filters \
    "Name=tag:Name,Values=${instance}" \
    "Name=instance-state-name,Values=running" \
    --output text --query 'Reservations[].Instances[].PublicIpAddress')
scp -i ../kubernetes.id_rsa \
    ${instance}.kubeconfig kube-proxy.kubeconfig ubuntu@${external_ip}:~/
done
Take note, we are in the configs/ folder, so to I added the ../kubernetes.id_rsa — which is one directory up from where we were in case you are getting permission denied errors.
Copy the kube-controller-manager and kube-scheduler kubeconfig files to each controller instance:
1
2
3
4
5
6
7
8
9
for instance in controller-0 controller-1 controller-2; do
  external_ip=$(aws ec2 describe-instances --filters \
    "Name=tag:Name,Values=${instance}" \
    "Name=instance-state-name,Values=running" \
    --output text --query 'Reservations[].Instances[].PublicIpAddress')

  scp -i ../kubernetes.id_rsa \
    admin.kubeconfig kube-controller-manager.kubeconfig kube-scheduler.kubeconfig ubuntu@${external_ip}:~/
done
Take note, we are in the configs/ folder, so to I added the ../kubernetes.id_rsa — which is one directory up from where we were in case you are getting permission denied errors.
Generating the Data Encryption Config and Key
Kubernetes stores a variety of data including cluster state, application configurations, and secrets. Kubernetes supports the ability to encrypt cluster data at rest.
For this we need to generate an encryption key and an encryption config suitable for encrypting Kubernetes Secrets.
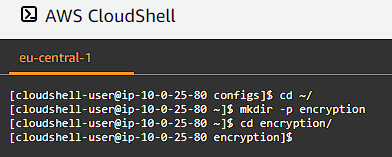
For this we will go back to our home folder and create a folder called encryption and then change into that folder:
1
2
3
cd ~/
mkdir -p encryption
cd encryption/
The Encryption Key
Generate an encryption key:
1
ENCRYPTION_KEY=$(head -c 32 /dev/urandom | base64)
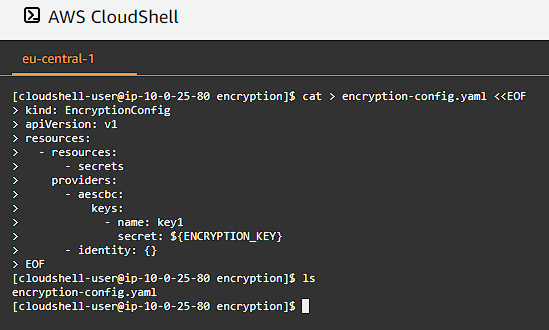
The Encryption Config
Create the encryption-config.yaml encryption config file:
1
2
3
4
5
6
7
8
9
10
11
12
13
cat > encryption-config.yaml <<EOF
kind: EncryptionConfig
apiVersion: v1
resources:
  - resources:
      - secrets
    providers:
      - aescbc:
          keys:
            - name: key1
              secret: ${ENCRYPTION_KEY}
      - identity: {}
EOF
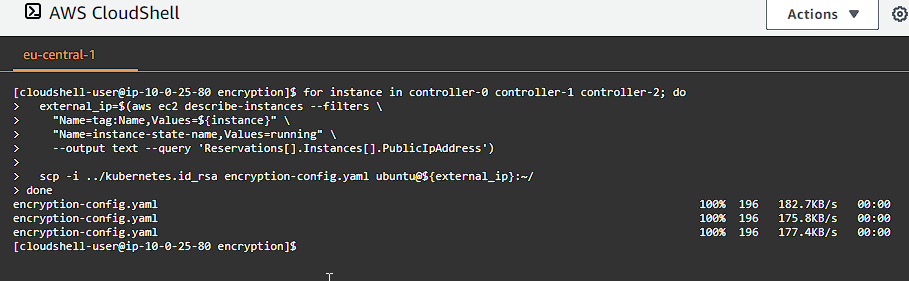
Copy the encryption-config.yaml encryption config file to each controller instance:
1
2
3
4
5
6
7
8
for instance in controller-0 controller-1 controller-2; do
  external_ip=$(aws ec2 describe-instances --filters \
    "Name=tag:Name,Values=${instance}" \
    "Name=instance-state-name,Values=running" \
    --output text --query 'Reservations[].Instances[].PublicIpAddress')

  scp -i ../kubernetes.id_rsa encryption-config.yaml ubuntu@${external_ip}:~/
done
Bootstrapping the etcd Cluster
Let’s first return to our home directory:
1
cd ~/
Kubernetes components are stateless and store cluster state in etcd. We are going to provision a three node etcd cluster and configure it for HA (High Availability) and secure remote access.
The next command will generate our SSH command line arguments to be able to connect to our controller instances:
1
2
3
4
5
6
7
for instance in controller-0 controller-1 controller-2; do
  external_ip=$(aws ec2 describe-instances --filters \
    "Name=tag:Name,Values=${instance}" \
    "Name=instance-state-name,Values=running" \
    --output text --query 'Reservations[].Instances[].PublicIpAddress')
echo ssh -i kubernetes.id_rsa ubuntu@$external_ip
done
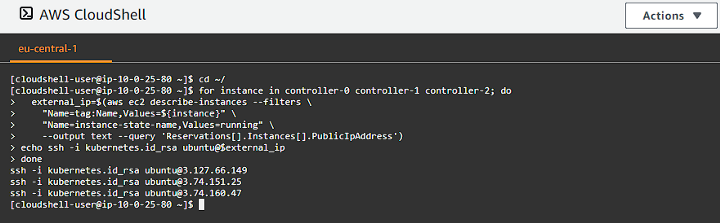
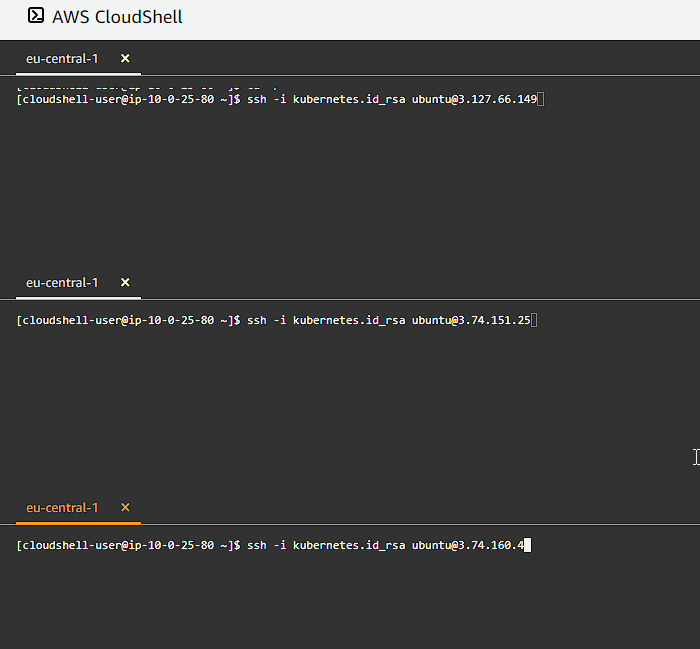
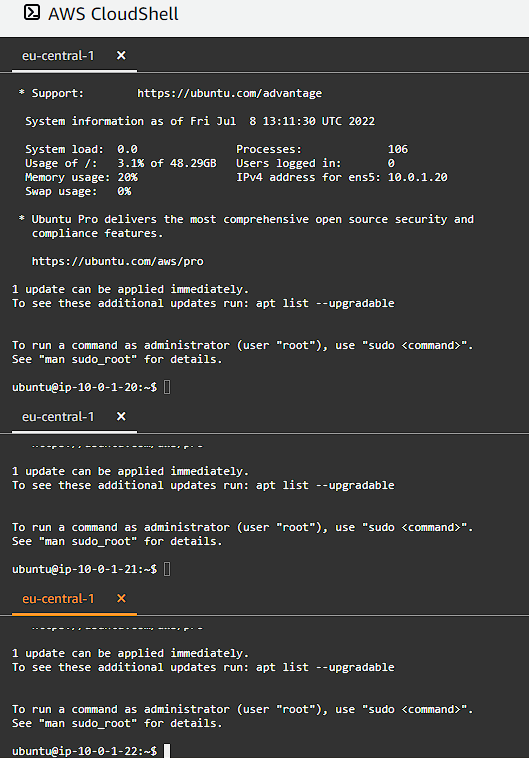
You can now use tmux to create multiple panes and connect to each instance. I am using AWS CloudShell, so I will be creating separate rows:

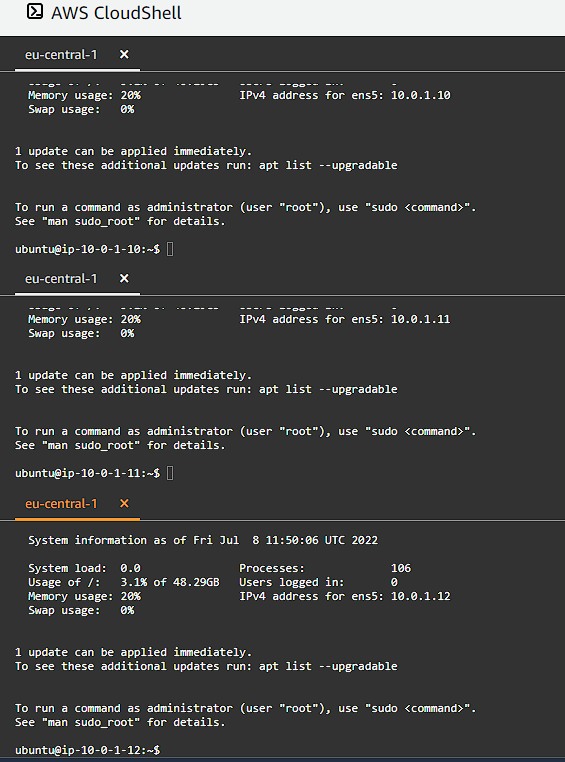
Bootstrapping and etcd Cluster Member
After logging in to each controller node, we now need to download the official etcd release binaries from the etcd GitHub project (run this on each node):
1
2
3
4
wget -q --timestamping \
  "https://github.com/etcd-io/etcd/releases/download/v3.4.15/etcd-v3.4.15-linux-amd64.tar.gz"
tar -xvf etcd-v3.4.15-linux-amd64.tar.gz
sudo mv etcd-v3.4.15-linux-amd64/etcd* /usr/local/bin/

Configure the etcd Server
Next we create the necessary configuration folders and copy over the certificates and keys. We also get the internal IP address of the node to use in the configuration files. We also need to set a unique name within an etcd cluster. Remember to run this one each controller instance:
1
2
3
4
5
6
7
sudo mkdir -p /etc/etcd /var/lib/etcd
sudo chmod 700 /var/lib/etcd
sudo cp ca.pem kubernetes-key.pem kubernetes.pem /etc/etcd/
INTERNAL_IP=$(curl -s http://169.254.169.254/latest/meta-data/local-ipv4)
ETCD_NAME=$(curl -s http://169.254.169.254/latest/user-data/ \
  | tr "|" "\n" | grep "^name" | cut -d"=" -f2)
echo "${ETCD_NAME}"

We want to encure etcd is started on each controller at boot time, so we need to create an etcd.service systemd unit file, as well as enable and start the etcd service (remember to run this on each controller node):
1
2
3
4
5
6
7
8
9
10
11
12
13
14
15
16
17
18
19
20
21
22
23
24
25
26
27
28
29
30
31
32
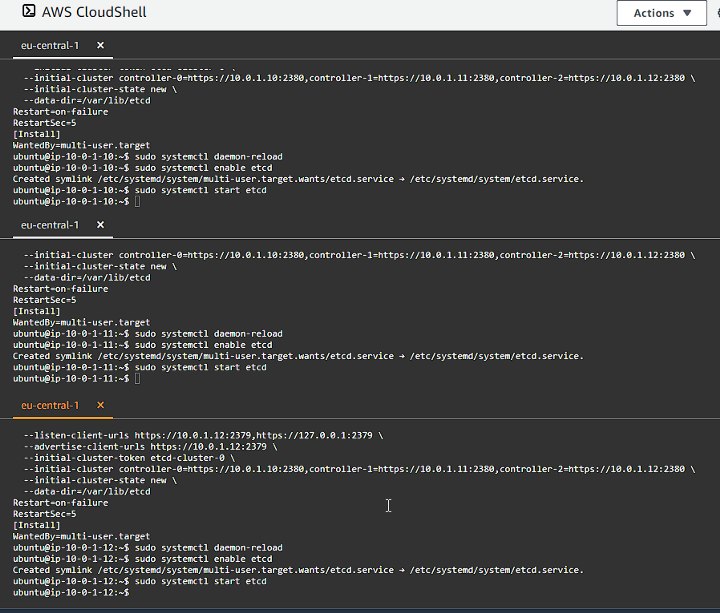
cat <<EOF | sudo tee /etc/systemd/system/etcd.service
[Unit]
Description=etcd
Documentation=https://github.com/coreos
[Service]
Type=notify
ExecStart=/usr/local/bin/etcd \\
--name ${ETCD_NAME} \\
--cert-file=/etc/etcd/kubernetes.pem \\
--key-file=/etc/etcd/kubernetes-key.pem \\
--peer-cert-file=/etc/etcd/kubernetes.pem \\
--peer-key-file=/etc/etcd/kubernetes-key.pem \\
--trusted-ca-file=/etc/etcd/ca.pem \\
--peer-trusted-ca-file=/etc/etcd/ca.pem \\
--peer-client-cert-auth \\
--client-cert-auth \\
--initial-advertise-peer-urls https://${INTERNAL_IP}:2380 \\
--listen-peer-urls https://${INTERNAL_IP}:2380 \\
--listen-client-urls https://${INTERNAL_IP}:2379,https://127.0.0.1:2379 \\
--advertise-client-urls https://${INTERNAL_IP}:2379 \\
--initial-cluster-token etcd-cluster-0 \\
--initial-cluster controller-0=https://10.0.1.10:2380,controller-1=https://10.0.1.11:2380,controller-2=https://10.0.1.12:2380 \\
--initial-cluster-state new \\
--data-dir=/var/lib/etcd
Restart=on-failure
RestartSec=5
[Install]
WantedBy=multi-user.target
EOF
sudo systemctl daemon-reload
sudo systemctl enable etcd
sudo systemctl start etcd
You can check the status of the etcd service by running:
1
sudo service etcd status
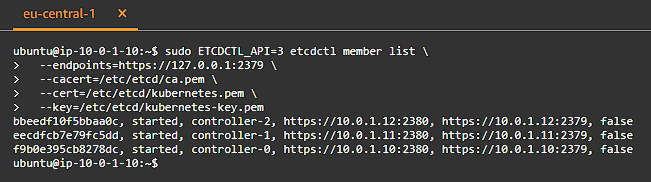
We can also verify the etcd cluster members by running:
1
2
3
4
5
sudo ETCDCTL_API=3 etcdctl member list \
  --endpoints=https://127.0.0.1:2379 \
  --cacert=/etc/etcd/ca.pem \
  --cert=/etc/etcd/kubernetes.pem \
  --key=/etc/etcd/kubernetes-key.pem
Bootstrapping the Kubernetes Control Plane
We will be installing the following components on each of our controller nodes: Kubernetes API Server, Scheduler, and Controller Manager.
Ensure that you have logged into each of the controller nodes via SSH, you can get the SSH command list by running:
1
2
3
4
5
6
7
for instance in controller-0 controller-1 controller-2; do
  external_ip=$(aws ec2 describe-instances --filters \
    "Name=tag:Name,Values=${instance}" \
    "Name=instance-state-name,Values=running" \
    --output text --query 'Reservations[].Instances[].PublicIpAddress')
echo ssh -i kubernetes.id_rsa ubuntu@$external_ip
done
Provisioning the Kubernetes Control Plane
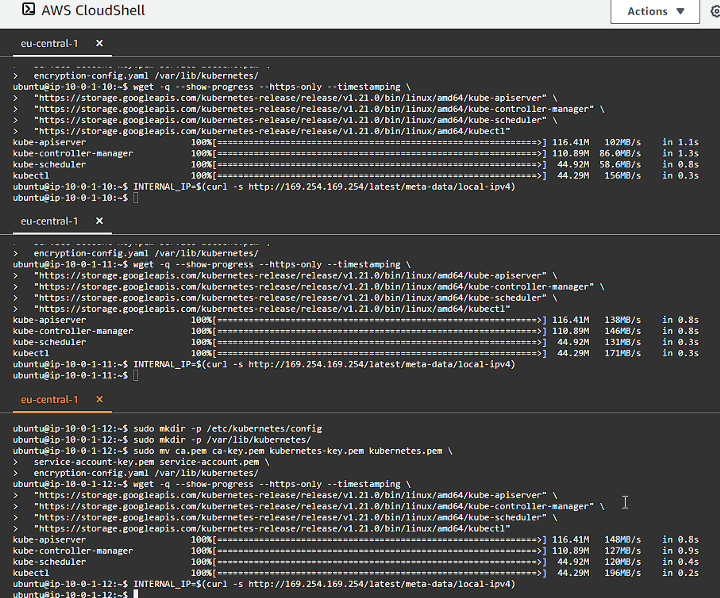
We will be creating our directory structure, as well as downloading and installing the binaries and copying over our certificates and keys that we need. We also determin the internal IP address of our node so we can use it in our configurations.
Remember to run this on each one of our controller nodes:
1
2
3
4
5
6
7
8
9
10
11
12
13
sudo mkdir -p /etc/kubernetes/config
sudo mkdir -p /var/lib/kubernetes/
sudo mv ca.pem ca-key.pem kubernetes-key.pem kubernetes.pem \
  service-account-key.pem service-account.pem \
  encryption-config.yaml /var/lib/kubernetes/
wget -q --show-progress --https-only --timestamping \
  "https://storage.googleapis.com/kubernetes-release/release/v1.21.0/bin/linux/amd64/kube-apiserver" \
  "https://storage.googleapis.com/kubernetes-release/release/v1.21.0/bin/linux/amd64/kube-controller-manager" \
  "https://storage.googleapis.com/kubernetes-release/release/v1.21.0/bin/linux/amd64/kube-scheduler" \
  "https://storage.googleapis.com/kubernetes-release/release/v1.21.0/bin/linux/amd64/kubectl"
chmod +x kube-apiserver kube-controller-manager kube-scheduler kubectl
sudo mv kube-apiserver kube-controller-manager kube-scheduler kubectl /usr/local/bin/
INTERNAL_IP=$(curl -s http://169.254.169.254/latest/meta-data/local-ipv4)
We want to encure kube-apiserver service is started on each controller at boot time, so we need to create an kube-apiserver.service systemd unit file (remember to run this on each controller node):
1
2
3
4
5
6
7
8
9
10
11
12
13
14
15
16
17
18
19
20
21
22
23
24
25
26
27
28
29
30
31
32
33
34
35
36
37
38
39
40
cat <<EOF | sudo tee /etc/systemd/system/kube-apiserver.service
[Unit]
Description=Kubernetes API Server
Documentation=https://github.com/kubernetes/kubernetes
[Service]
ExecStart=/usr/local/bin/kube-apiserver \\
  --advertise-address=${INTERNAL_IP} \\
  --allow-privileged=true \\
  --apiserver-count=3 \\
  --audit-log-maxage=30 \\
  --audit-log-maxbackup=3 \\
  --audit-log-maxsize=100 \\
  --audit-log-path=/var/log/audit.log \\
  --authorization-mode=Node,RBAC \\
  --bind-address=0.0.0.0 \\
  --client-ca-file=/var/lib/kubernetes/ca.pem \\
  --enable-admission-plugins=NamespaceLifecycle,NodeRestriction,LimitRanger,ServiceAccount,DefaultStorageClass,ResourceQuota \\
  --etcd-cafile=/var/lib/kubernetes/ca.pem \\
  --etcd-certfile=/var/lib/kubernetes/kubernetes.pem \\
  --etcd-keyfile=/var/lib/kubernetes/kubernetes-key.pem \\
  --etcd-servers=https://10.0.1.10:2379,https://10.0.1.11:2379,https://10.0.1.12:2379 \\
  --event-ttl=1h \\
  --encryption-provider-config=/var/lib/kubernetes/encryption-config.yaml \\
  --kubelet-certificate-authority=/var/lib/kubernetes/ca.pem \\
  --kubelet-client-certificate=/var/lib/kubernetes/kubernetes.pem \\
  --kubelet-client-key=/var/lib/kubernetes/kubernetes-key.pem \\
  --runtime-config='api/all=true' \\
  --service-account-key-file=/var/lib/kubernetes/service-account.pem \\
  --service-account-signing-key-file=/var/lib/kubernetes/service-account-key.pem \\
  --service-account-issuer=https://${KUBERNETES_PUBLIC_ADDRESS}:443 \\
  --service-cluster-ip-range=10.32.0.0/24 \\
  --service-node-port-range=30000-32767 \\
  --tls-cert-file=/var/lib/kubernetes/kubernetes.pem \\
  --tls-private-key-file=/var/lib/kubernetes/kubernetes-key.pem \\
  --v=2
Restart=on-failure
RestartSec=5
[Install]
WantedBy=multi-user.target
EOF
Configure the Kubernetes Controller Manager
Move the kube-controller-manager kubeconfig into place (remember to run this on each controller node):
1
sudo mv kube-controller-manager.kubeconfig /var/lib/kubernetes/
Create the kube-controller-manager.service systemd unit file (remember to run this on each controller node):
1
2
3
4
5
6
7
8
9
10
11
12
13
14
15
16
17
18
19
20
21
22
23
cat <<EOF | sudo tee /etc/systemd/system/kube-controller-manager.service
[Unit]
Description=Kubernetes Controller Manager
Documentation=https://github.com/kubernetes/kubernetes
[Service]
ExecStart=/usr/local/bin/kube-controller-manager \\
  --bind-address=0.0.0.0 \\
  --cluster-cidr=10.200.0.0/16 \\
  --cluster-name=kubernetes \\
  --cluster-signing-cert-file=/var/lib/kubernetes/ca.pem \\
  --cluster-signing-key-file=/var/lib/kubernetes/ca-key.pem \\
  --kubeconfig=/var/lib/kubernetes/kube-controller-manager.kubeconfig \\
  --leader-elect=true \\
  --root-ca-file=/var/lib/kubernetes/ca.pem \\
  --service-account-private-key-file=/var/lib/kubernetes/service-account-key.pem \\
  --service-cluster-ip-range=10.32.0.0/24 \\
  --use-service-account-credentials=true \\
  --v=2
Restart=on-failure
RestartSec=5
[Install]
WantedBy=multi-user.target
EOF
Configure the Kubernetes Scheduler
Move the kube-scheduler kubeconfig into place (remember to run this on each controller node):
1
sudo mv kube-scheduler.kubeconfig /var/lib/kubernetes/
Create the kube-scheuduler.yaml configuration file:
1
2
3
4
5
6
7
8
cat <<EOF | sudo tee /etc/kubernetes/config/kube-scheduler.yaml
apiVersion: kubescheduler.config.k8s.io/v1beta1
kind: KubeSchedulerConfiguration
clientConnection:
  kubeconfig: "/var/lib/kubernetes/kube-scheduler.kubeconfig"
leaderElection:
  leaderElect: true
EOF
Create the kube-scheduler.service systemd unit file:
1
2
3
4
5
6
7
8
9
10
11
12
13
cat <<EOF | sudo tee /etc/systemd/system/kube-scheduler.service
[Unit]
Description=Kubernetes Scheduler
Documentation=https://github.com/kubernetes/kubernetes
[Service]
ExecStart=/usr/local/bin/kube-scheduler \\
  --config=/etc/kubernetes/config/kube-scheduler.yaml \\
  --v=2
Restart=on-failure
RestartSec=5
[Install]
WantedBy=multi-user.target
EOF
Enable start-on-boot and Start the Controller Services
Remember to run this on each controller node:
1
2
3
sudo systemctl daemon-reload
sudo systemctl enable kube-apiserver kube-controller-manager kube-scheduler
sudo systemctl start kube-apiserver kube-controller-manager kube-scheduler
Add Host File Entries
In order for kubectl exec commands to work, the controller nodes must each be able to resolve the worker hostnames. This is not set up by default in AWS. The workaround is to add manual host entries on each of the controller nodes:
1
2
3
4
5
cat <<EOF | sudo tee -a /etc/hosts
10.0.1.20 ip-10-0-1-20
10.0.1.21 ip-10-0-1-21
10.0.1.22 ip-10-0-1-22
EOF
If this step is missed, the DNS Cluster Add-on testing will fail with an error like:
1
Error from server: error dialing backend: dial tcp: lookup ip-10-0-1-22 on 127.0.0.53:53: server misbehaving
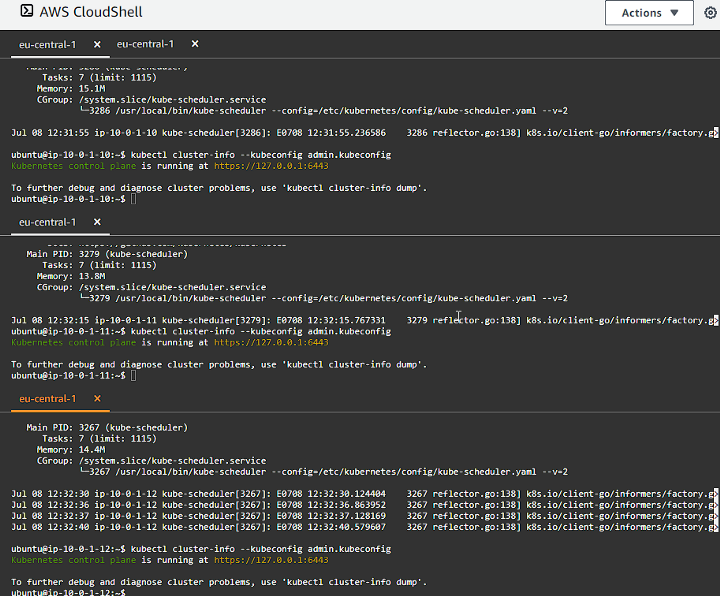
Verify that you can access the Kubernetes cluster on the control plane nodes
1
kubectl cluster-info --kubeconfig admin.kubeconfig
RBAC For Kubelet Authorization
We need to setup roles and permissions for the Kubernetes API Server to access the Kubelet API on each worker node. Access to the Kubelet API is required for retrieving metrics, logs and executing commands in pods.
The commands in this section will affect the entire cluster and only need to be run once from one of the controller nodes, the command below will print out the SSH command that you should use to connect to an instance:
1
2
3
4
5
external_ip=$(aws ec2 describe-instances --filters \
    "Name=tag:Name,Values=controller-0" \
    "Name=instance-state-name,Values=running" \
    --output text --query 'Reservations[].Instances[].PublicIpAddress')
ssh -i kubernetes.id_rsa ubuntu@${external_ip}
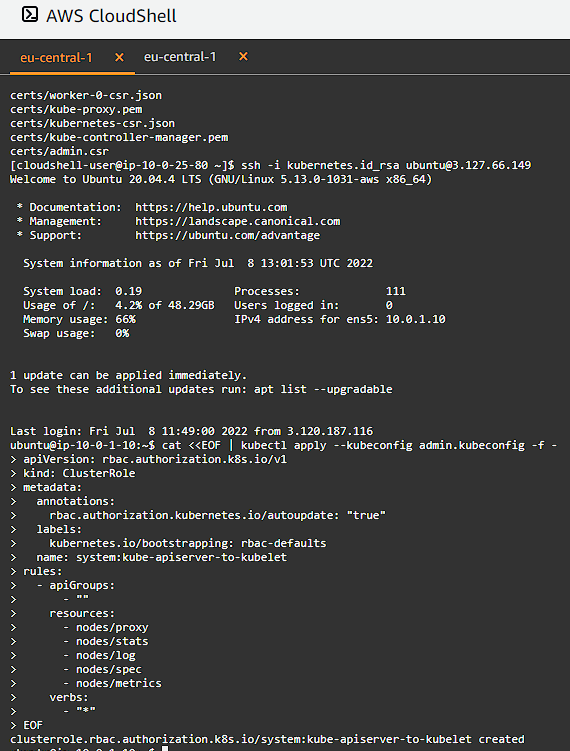
Create the system:kube-apiserver-to-kubelet ClusterRole with permissions to acccess the Kubelet API and perform some common tasks associated with managing pods:
1
2
3
4
5
6
7
8
9
10
11
12
13
14
15
16
17
18
19
20
21
cat <<EOF | kubectl apply --kubeconfig admin.kubeconfig -f -
apiVersion: rbac.authorization.k8s.io/v1
kind: ClusterRole
metadata:
  annotations:
    rbac.authorization.kubernetes.io/autoupdate: "true"
  labels:
    kubernetes.io/bootstrapping: rbac-defaults
  name: system:kube-apiserver-to-kubelet
rules:
  - apiGroups:
      - ""
    resources:
      - nodes/proxy
      - nodes/stats
      - nodes/log
      - nodes/spec
      - nodes/metrics
    verbs:
      - "*"
EOF
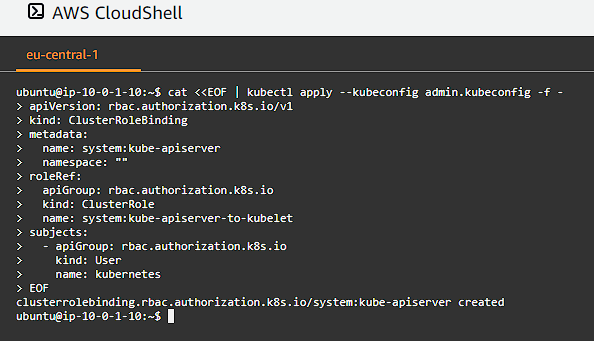
Bind the system:kube-apiserver-to-kubelet ClusterRole to the kubernetes user:
1
2
3
4
5
6
7
8
9
10
11
12
13
14
15
cat <<EOF | kubectl apply --kubeconfig admin.kubeconfig -f -
apiVersion: rbac.authorization.k8s.io/v1
kind: ClusterRoleBinding
metadata:
  name: system:kube-apiserver
  namespace: ""
roleRef:
  apiGroup: rbac.authorization.k8s.io
  kind: ClusterRole
  name: system:kube-apiserver-to-kubelet
subjects:
  - apiGroup: rbac.authorization.k8s.io
    kind: User
    name: kubernetes
EOF
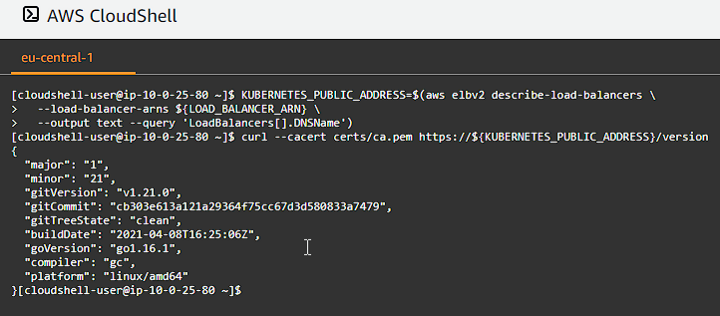
Verify the cluster public endpoint
Log out of the SSH connection and head back to the main terminal window as you need to execute AWS commands to verify the public endpoint remotely:
1
2
3
4
KUBERNETES_PUBLIC_ADDRESS=$(aws elbv2 describe-load-balancers \
  --load-balancer-arns ${LOAD_BALANCER_ARN} \
  --output text --query 'LoadBalancers[].DNSName')
curl --cacert certs/ca.pem https://${KUBERNETES_PUBLIC_ADDRESS}/version
Bootstrapping the Kubernetes Worker Nodes
The following components will be installed on each node: runc, container networking plugins, containerd, kubelet, and kube-proxy.
The commands need to be run on each worker instance. Let’s generate our SSH command list:
1
2
3
4
5
6
7
for instance in worker-0 worker-1 worker-2; do
  external_ip=$(aws ec2 describe-instances --filters \
    "Name=tag:Name,Values=${instance}" \
    "Name=instance-state-name,Values=running" \
    --output text --query 'Reservations[].Instances[].PublicIpAddress')
echo ssh -i kubernetes.id_rsa ubuntu@$external_ip
done
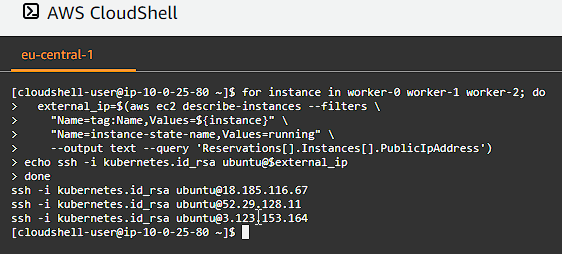
SSH into each instance in a separate pane.
Provision a Kubernetes Worker Node
Install the OS dependencies, disable swap and download and install the worker binaries:
1
2
3
4
5
6
7
8
9
10
11
12
13
14
15
16
17
18
19
20
21
22
23
24
25
26
27
sudo apt-get update
sudo apt-get -y install socat conntrack ipset
sudo swapon --show
sudo swapoff -a
wget -q --show-progress --https-only --timestamping \
  https://github.com/kubernetes-sigs/cri-tools/releases/download/v1.21.0/crictl-v1.21.0-linux-amd64.tar.gz \
  https://github.com/opencontainers/runc/releases/download/v1.0.0-rc93/runc.amd64 \
  https://github.com/containernetworking/plugins/releases/download/v0.9.1/cni-plugins-linux-amd64-v0.9.1.tgz \
  https://github.com/containerd/containerd/releases/download/v1.4.4/containerd-1.4.4-linux-amd64.tar.gz \
  https://storage.googleapis.com/kubernetes-release/release/v1.21.0/bin/linux/amd64/kubectl \
  https://storage.googleapis.com/kubernetes-release/release/v1.21.0/bin/linux/amd64/kube-proxy \
  https://storage.googleapis.com/kubernetes-release/release/v1.21.0/bin/linux/amd64/kubelet
sudo mkdir -p \
  /etc/cni/net.d \
  /opt/cni/bin \
  /var/lib/kubelet \
  /var/lib/kube-proxy \
  /var/lib/kubernetes \
  /var/run/kubernetes
mkdir containerd
tar -xvf crictl-v1.21.0-linux-amd64.tar.gz
tar -xvf containerd-1.4.4-linux-amd64.tar.gz -C containerd
sudo tar -xvf cni-plugins-linux-amd64-v0.9.1.tgz -C /opt/cni/bin/
sudo mv runc.amd64 runc
chmod +x crictl kubectl kube-proxy kubelet runc
sudo mv crictl kubectl kube-proxy kubelet runc /usr/local/bin/
sudo mv containerd/bin/* /bin/
Configure the CNI Networking
Retrieve the Pod CIDR range for teh current compute instance. Create a network bridge and loopback configuration (remember to run on each worker node):
1
2
3
4
5
6
7
8
9
10
11
12
13
14
15
16
17
18
19
20
21
22
23
24
25
26
27
POD_CIDR=$(curl -s http://169.254.169.254/latest/user-data/ \
  | tr "|" "\n" | grep "^pod-cidr" | cut -d"=" -f2)
echo "${POD_CIDR}"
cat <<EOF | sudo tee /etc/cni/net.d/10-bridge.conf
{
    "cniVersion": "0.4.0",
    "name": "bridge",
    "type": "bridge",
    "bridge": "cnio0",
    "isGateway": true,
    "ipMasq": true,
    "ipam": {
        "type": "host-local",
        "ranges": [
          [{"subnet": "${POD_CIDR}"}]
        ],
        "routes": [{"dst": "0.0.0.0/0"}]
    }
}
EOF
cat <<EOF | sudo tee /etc/cni/net.d/99-loopback.conf
{
    "cniVersion": "0.4.0",
    "name": "lo",
    "type": "loopback"
}
EOF
Configure containerd
Create a containerd configuration file and create the containerd.service systemd unit file (remember to run on each worker node):
1
2
3
4
5
6
7
8
9
10
11
12
13
14
15
16
17
18
19
20
21
22
23
24
25
26
27
28
29
sudo mkdir -p /etc/containerd/
cat << EOF | sudo tee /etc/containerd/config.toml
[plugins]
  [plugins.cri.containerd]
    snapshotter = "overlayfs"
    [plugins.cri.containerd.default_runtime]
      runtime_type = "io.containerd.runtime.v1.linux"
      runtime_engine = "/usr/local/bin/runc"
      runtime_root = ""
EOF
cat <<EOF | sudo tee /etc/systemd/system/containerd.service
[Unit]
Description=containerd container runtime
Documentation=https://containerd.io
After=network.target
[Service]
ExecStartPre=/sbin/modprobe overlay
ExecStart=/bin/containerd
Restart=always
RestartSec=5
Delegate=yes
KillMode=process
OOMScoreAdjust=-999
LimitNOFILE=1048576
LimitNPROC=infinity
LimitCORE=infinity
[Install]
WantedBy=multi-user.target
EOF
Configure the Kubelet
Move and store the certificate and keys and create the necessary folders and configuration (remember to run on each worker node):
1
2
3
4
5
6
7
8
9
10
11
12
13
14
15
16
17
18
19
20
21
22
23
24
25
26
27
WORKER_NAME=$(curl -s http://169.254.169.254/latest/user-data/ \
| tr "|" "\n" | grep "^name" | cut -d"=" -f2)
echo "${WORKER_NAME}"
sudo mv ${WORKER_NAME}-key.pem ${WORKER_NAME}.pem /var/lib/kubelet/
sudo mv ${WORKER_NAME}.kubeconfig /var/lib/kubelet/kubeconfig
sudo mv ca.pem /var/lib/kubernetes/
cat <<EOF | sudo tee /var/lib/kubelet/kubelet-config.yaml
kind: KubeletConfiguration
apiVersion: kubelet.config.k8s.io/v1beta1
authentication:
  anonymous:
    enabled: false
  webhook:
    enabled: true
  x509:
    clientCAFile: "/var/lib/kubernetes/ca.pem"
authorization:
  mode: Webhook
clusterDomain: "cluster.local"
clusterDNS:
  - "10.32.0.10"
podCIDR: "${POD_CIDR}"
resolvConf: "/run/systemd/resolve/resolv.conf"
runtimeRequestTimeout: "15m"
tlsCertFile: "/var/lib/kubelet/${WORKER_NAME}.pem"
tlsPrivateKeyFile: "/var/lib/kubelet/${WORKER_NAME}-key.pem"
EOF
The resolveConf configuration is used to avoid loops when using CoreDNS for service discovery on systems running systemd-resolved.
Create the kubelet.service systemd unit file (remember to run on each worker node):
1
2
3
4
5
6
7
8
9
10
11
12
13
14
15
16
17
18
19
20
21
cat <<EOF | sudo tee /etc/systemd/system/kubelet.service
[Unit]
Description=Kubernetes Kubelet
Documentation=https://github.com/kubernetes/kubernetes
After=containerd.service
Requires=containerd.service
[Service]
ExecStart=/usr/local/bin/kubelet \\
  --config=/var/lib/kubelet/kubelet-config.yaml \\
  --container-runtime=remote \\
  --container-runtime-endpoint=unix:///var/run/containerd/containerd.sock \\
  --image-pull-progress-deadline=2m \\
  --kubeconfig=/var/lib/kubelet/kubeconfig \\
  --network-plugin=cni \\
  --register-node=true \\
  --v=2
Restart=on-failure
RestartSec=5
[Install]
WantedBy=multi-user.target
EOF
Configure the Kubernetes Proxy
Move the kube-proxy kubeconfig into place, create the kube-proxy-config and finally create the kube-proxy.service systemd unit file (remember to run on each worker node):
1
2
3
4
5
6
7
8
9
10
11
12
13
14
15
16
17
18
19
20
21
sudo mv kube-proxy.kubeconfig /var/lib/kube-proxy/kubeconfig
cat <<EOF | sudo tee /var/lib/kube-proxy/kube-proxy-config.yaml
kind: KubeProxyConfiguration
apiVersion: kubeproxy.config.k8s.io/v1alpha1
clientConnection:
  kubeconfig: "/var/lib/kube-proxy/kubeconfig"
mode: "iptables"
clusterCIDR: "10.200.0.0/16"
EOF
cat <<EOF | sudo tee /etc/systemd/system/kube-proxy.service
[Unit]
Description=Kubernetes Kube Proxy
Documentation=https://github.com/kubernetes/kubernetes
[Service]
ExecStart=/usr/local/bin/kube-proxy \\
  --config=/var/lib/kube-proxy/kube-proxy-config.yaml
Restart=on-failure
RestartSec=5
[Install]
WantedBy=multi-user.target
EOF
Enable start-at-boot and Start the Worker Services
Remember to run on each worker node:
1
2
3
sudo systemctl daemon-reload
sudo systemctl enable containerd kubelet kube-proxy
sudo systemctl start containerd kubelet kube-proxy
Verify all is working
Switch back to you terminal that has the AWS permissions (not the logged in worker node) and run:
1
2
3
4
5
external_ip=$(aws ec2 describe-instances --filters \
    "Name=tag:Name,Values=controller-0" \
    "Name=instance-state-name,Values=running" \
    --output text --query 'Reservations[].Instances[].PublicIpAddress')
ssh -i kubernetes.id_rsa ubuntu@${external_ip} kubectl get nodes --kubeconfig admin.kubeconfig
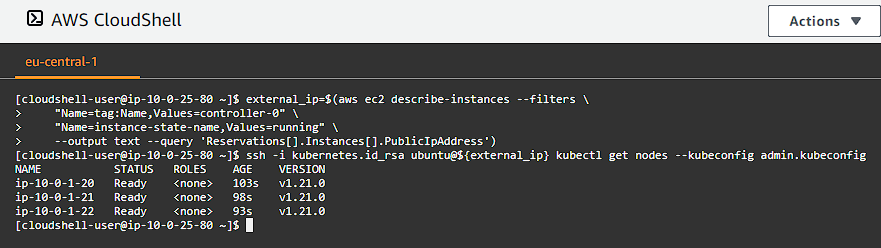
We can see the 3 worker nodes up and running and are Ready.
Configuring kubectl for Remote Access
We will generate a kubeconfig file for the kubectl command line utility based on the admin user credentials.
Each kubeconfig requires a Kubernetes API Server to connect to. To support HA (High Availability), the DNS name of the external load balancer fronting the Kubernetes API servers will be used.
Generate a kubeconfig file suitable for authenticating as the admin user:
1
2
3
4
5
6
7
8
9
10
11
12
13
14
15
cd ~
KUBERNETES_PUBLIC_ADDRESS=$(aws elbv2 describe-load-balancers \
--load-balancer-arns ${LOAD_BALANCER_ARN} \
--output text --query 'LoadBalancers[].DNSName')
kubectl config set-cluster kubernetes-from-scratch \
  --certificate-authority=certs/ca.pem \
  --embed-certs=true \
  --server=https://${KUBERNETES_PUBLIC_ADDRESS}:443
kubectl config set-credentials admin \
  --client-certificate=certs/admin.pem \
  --client-key=certs/admin-key.pem
kubectl config set-context kubernetes-from-scratch \
  --cluster=kubernetes-from-scratch \
  --user=admin
kubectl config use-context kubernetes-from-scratch
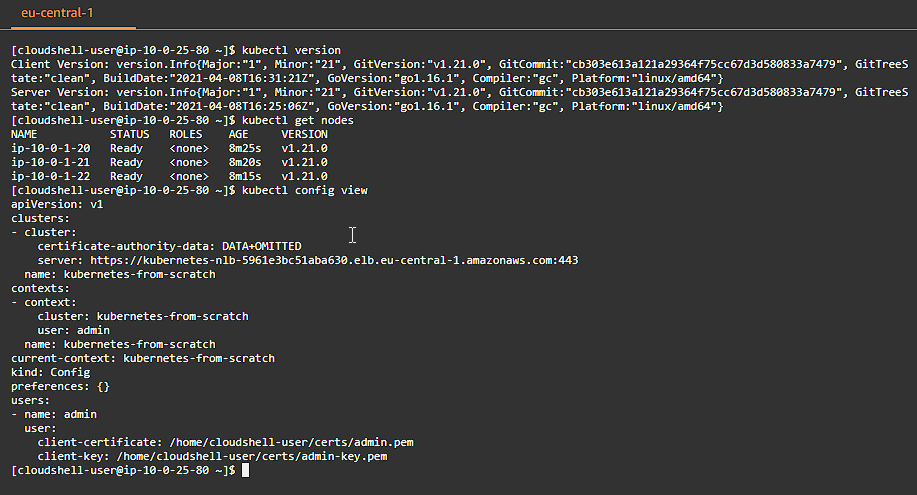
Verify all is good
Check the version of teh remote Kubernetes cluster:
1
2
3
kubectl version
kubectl get nodes
kubectl config view
Provisioning Pod Network Routes
Pods scheduled to a node receive an IP address from the node’s Pod CIDR range. At this point pods can not communicate with other pods running on different nodes due to missing network routes.
We will create a route for each worker node that maps the node’s Pod CIDR range to the node’s internal IP address.
However in production workloads, this functionality will be provided by CNI plugins like flannel, calico, amazon-vpc-cni-k8s. Doing this by hand makes it easier to understand what those plugins do behind the scenes.
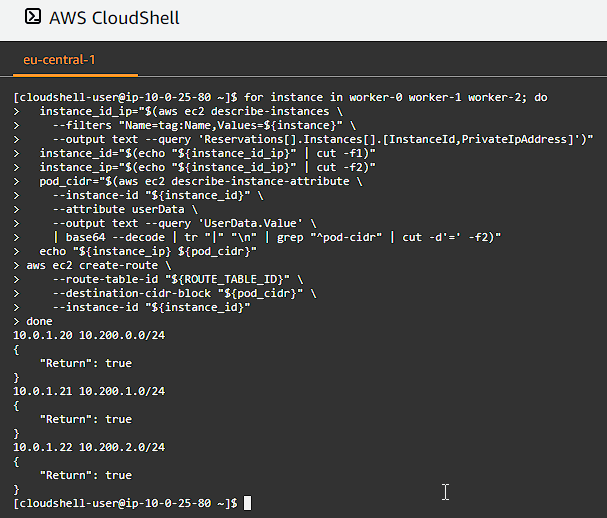
Print the internal IP address and Pod CIDR range for each worker instance and create route table entries:
1
2
3
4
5
6
7
8
9
10
11
12
13
14
15
16
17
for instance in worker-0 worker-1 worker-2; do
  instance_id_ip="$(aws ec2 describe-instances \
    --filters "Name=tag:Name,Values=${instance}" \
    --output text --query 'Reservations[].Instances[].[InstanceId,PrivateIpAddress]')"
  instance_id="$(echo "${instance_id_ip}" | cut -f1)"
  instance_ip="$(echo "${instance_id_ip}" | cut -f2)"
  pod_cidr="$(aws ec2 describe-instance-attribute \
    --instance-id "${instance_id}" \
    --attribute userData \
    --output text --query 'UserData.Value' \
    | base64 --decode | tr "|" "\n" | grep "^pod-cidr" | cut -d'=' -f2)"
  echo "${instance_ip} ${pod_cidr}"
aws ec2 create-route \
    --route-table-id "${ROUTE_TABLE_ID}" \
    --destination-cidr-block "${pod_cidr}" \
    --instance-id "${instance_id}"
done
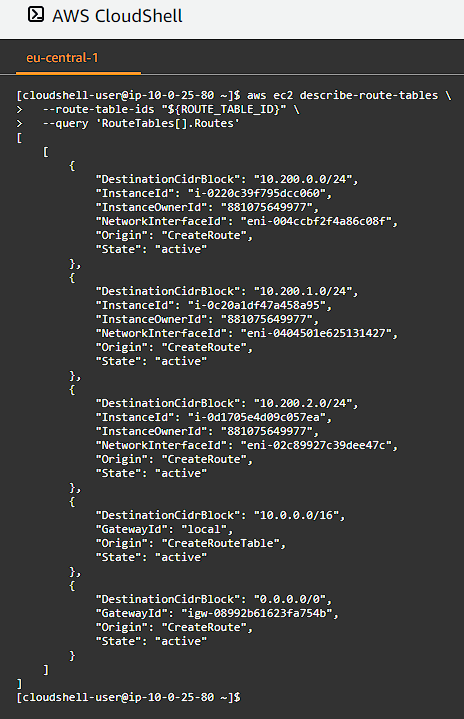
Validate Routes
Validate network routes for each worker instance:
1
2
3
aws ec2 describe-route-tables \
  --route-table-ids "${ROUTE_TABLE_ID}" \
  --query 'RouteTables[].Routes'
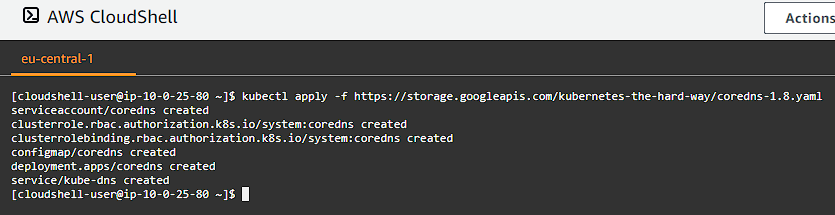
Deploying the DNS Cluster Add-on
We will now deploy the DNS add-on which provides DNS based service discovery, backed by CoreDNS, to applications running inside the Kubernetes cluster.
Deploy the coredns cluster add-on:
1
kubectl apply -f https://storage.googleapis.com/kubernetes-the-hard-way/coredns-1.8.yaml
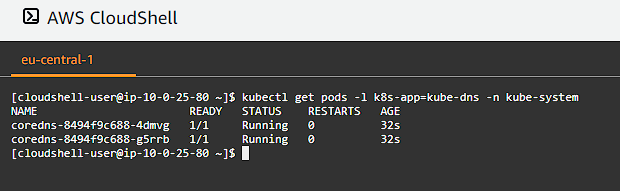
List pods created by the core-dns deployment:
1
kubectl get pods -l k8s-app=kube-dns -n kube-system
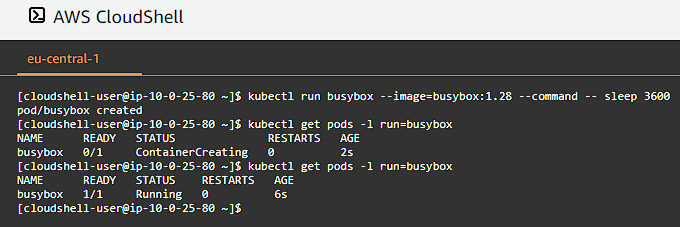
Verify all is ok
Create a busybox deployment and then list the pods:
1
2
kubectl run busybox --image=busybox:1.28 --command -- sleep 3600
kubectl get pods -l run=busybox
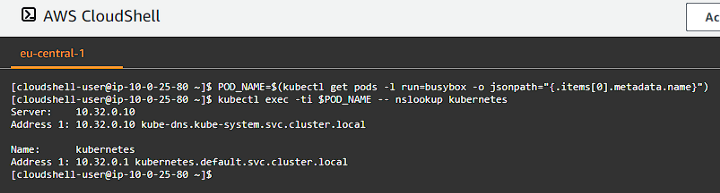
Retrieve the full name of the busybox pod and perform a DNS lookup for the kubernetes service inside the busybox pod:
1
2
POD_NAME=$(kubectl get pods -l run=busybox -o jsonpath="{.items[0].metadata.name}")
kubectl exec -ti $POD_NAME -- nslookup kubernetes
Smoke Test
Data Encryption
Verify the ability to encrypt secret data at rest by creating a generic secret and then using hexdump to inspect the entry stored in etcd:
1
2
3
4
5
6
7
8
9
10
11
12
13
kubectl create secret generic kubernetes-from-scratch \
  --from-literal="mykey=mydata"
external_ip=$(aws ec2 describe-instances --filters \
  "Name=tag:Name,Values=controller-0" \
  "Name=instance-state-name,Values=running" \
  --output text --query 'Reservations[].Instances[].PublicIpAddress')
ssh -i kubernetes.id_rsa ubuntu@${external_ip} \
 "sudo ETCDCTL_API=3 etcdctl get \
  --endpoints=https://127.0.0.1:2379 \
  --cacert=/etc/etcd/ca.pem \
  --cert=/etc/etcd/kubernetes.pem \
  --key=/etc/etcd/kubernetes-key.pem\
  /registry/secrets/default/kubernetes-from-scratch | hexdump -C"
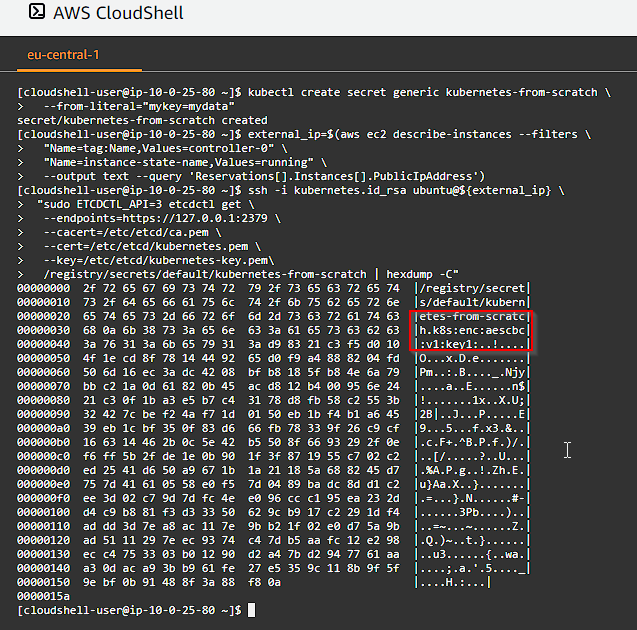
The etcd key should be prefixed with k8s:enc:aescbc:v1:key1, which indicates the aesbc provider was used to encrypt the data with the key1 encryption key.
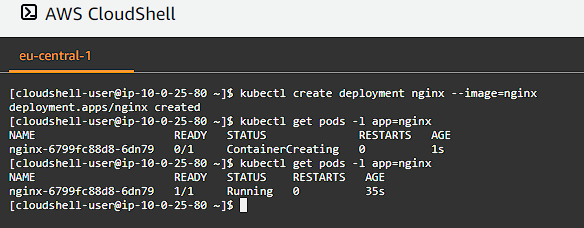
Creating Deployments
Deploy an nginx web server and list the pods:
1
2
kubectl create deployment nginx --image=nginx
kubectl get pods -l app=nginx
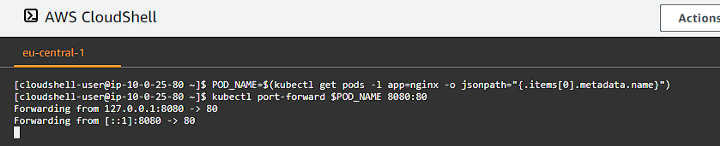
Port Forwarding
1
2
POD_NAME=$(kubectl get pods -l app=nginx -o jsonpath="{.items[0].metadata.name}")
kubectl port-forward $POD_NAME 8080:80
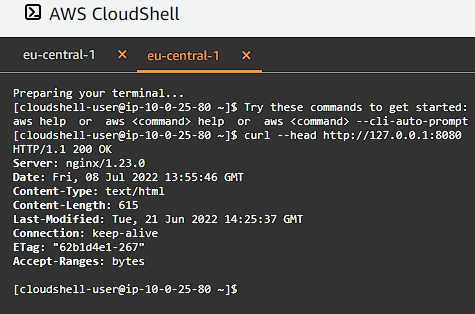
In a new terminal window perform an HTTP request to the port forwarded endpoint:
1
curl --head http://127.0.0.1:8080
Logs
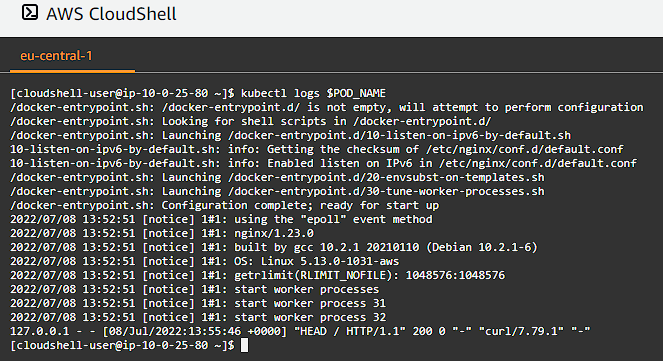
Print the nginx pod logs:
1
kubectl logs $POD_NAME
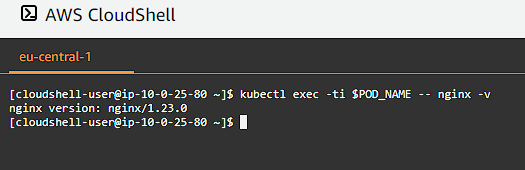
Exec
Verify we are able to execute commands in a container:
1
kubectl exec -ti $POD_NAME -- nginx -v
Services
Expose the nginx deployment using a NodePort service:
1
2
3
kubectl expose deployment nginx --port 80 --type NodePort
NODE_PORT=$(kubectl get svc nginx \
  --output=jsonpath='{range .spec.ports[0]}{.nodePort}')
Create a firewall rule that allows remote access to the nginx node port:
1
2
3
4
5
aws ec2 authorize-security-group-ingress \
  --group-id ${SECURITY_GROUP_ID} \
  --protocol tcp \
  --port ${NODE_PORT} \
  --cidr 0.0.0.0/0
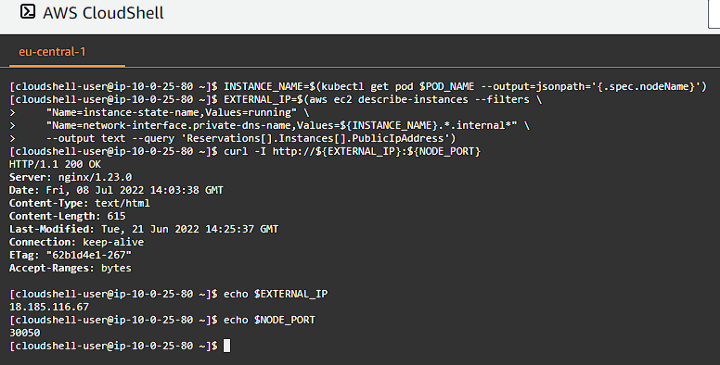
Get the worker node name where the nginx pod is running, and retrieve the external IP address of a worker instance, finally make an HTTP request to the external IP address and the nginx node port:
1
2
3
4
5
6
INSTANCE_NAME=$(kubectl get pod $POD_NAME --output=jsonpath='{.spec.nodeName}')
EXTERNAL_IP=$(aws ec2 describe-instances --filters \
    "Name=instance-state-name,Values=running" \
    "Name=network-interface.private-dns-name,Values=${INSTANCE_NAME}.*.internal*" \
    --output text --query 'Reservations[].Instances[].PublicIpAddress')
curl -I http://${EXTERNAL_IP}:${NODE_PORT}
Bonus: Scanning for Vulnerabilities using kube-hunter
kube-hunter hunts for security weaknesses in Kubernetes clusters. The tool was developed to increase awareness and visibility for security issues in Kubernetes environments.
Deploy a job right into the cluster to scan for vulnerabilities:
1
2
3
4
5
6
7
8
9
10
11
12
13
14
15
16
17
18
cat <<EOF | kubectl apply --kubeconfig admin.kubeconfig -f -
apiVersion: batch/v1
kind: Job
metadata:
  name: kube-hunter
spec:
  template:
    metadata:
      labels:
        app: kube-hunter
    spec:
      containers:
        - name: kube-hunter
          image: aquasec/kube-hunter:0.6.8
          command: ["kube-hunter"]
          args: ["--pod"]
      restartPolicy: Never
EOF
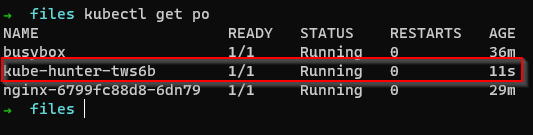
Let’s now check the logs and the output produced by kubehunter:
1
2
3
4
5
6
7
8
9
10
11
12
13
14
15
16
17
18
19
20
21
22
23
24
25
26
27
28
29
30
31
32
33
34
35
36
37
38
39
40
41
42
43
44
45
46
47
48
49
50
51
52
53
54
55
56
57
58
59
60
61
62
63
64
65
66
67
68
69
70
71
72
73
74
75
76
77
78
79
80
81
82
83
84
85
86
87
88
89
90
91
92
93
94
95
96
97
98
99
100
101
102
103
104
105
106
107
108
109
110
111
112
113
114
115
116
117
118
119
120
121
122
123
124
125
126
127
128
129
130
131
132
133
134
135
136
137
138
139
140
141
142
143
144
145
146
147
148
149
150
151
152
153
154
155
156
157
158
159
160
161
162
163
164
165
166
167
168
169
170
171
172
173
174
175
176
177
178
179
180
181
182
183
184
185
186
187
188
189
190
kubectl logs --kubeconfig admin.kubeconfig kube-hunter-tws6b > logs.txt
cat logs.txt
2022-07-08 14:22:13,466 INFO kube_hunter.modules.report.collector Started hunting
2022-07-08 14:22:13,471 INFO kube_hunter.modules.report.collector Discovering Open Kubernetes Services
2022-07-08 14:22:13,478 INFO kube_hunter.modules.report.collector Found vulnerability "CAP_NET_RAW Enabled" in Local to Pod (kube-hunter-tws6b)
2022-07-08 14:22:13,478 INFO kube_hunter.modules.report.collector Found vulnerability "Read access to pod's service account token" in Local to Pod (kube-hunter-tws6b)
2022-07-08 14:22:13,479 INFO kube_hunter.modules.report.collector Found vulnerability "Access to pod's secrets" in Local to Pod (kube-hunter-tws6b)
2022-07-08 14:22:13,515 INFO kube_hunter.modules.report.collector Found vulnerability "AWS Metadata Exposure" in Local to Pod (kube-hunter-tws6b)
2022-07-08 14:22:13,678 INFO kube_hunter.modules.report.collector Found open service "Kubelet API" at 10.0.1.20:10250
2022-07-08 14:22:13,691 INFO kube_hunter.modules.report.collector Found open service "Kubelet API" at 10.0.1.21:10250
2022-07-08 14:22:13,694 INFO kube_hunter.modules.report.collector Found open service "Etcd" at 10.0.1.10:2379
2022-07-08 14:22:13,695 INFO kube_hunter.modules.report.collector Found open service "Kubelet API" at 10.0.1.22:10250
2022-07-08 14:22:13,750 INFO kube_hunter.modules.report.collector Found open service "Etcd" at 10.0.1.12:2379
2022-07-08 14:22:13,754 INFO kube_hunter.modules.report.collector Found open service "Etcd" at 10.0.1.11:2379
2022-07-08 14:22:13,817 INFO kube_hunter.modules.report.collector Found open service "Kubelet API" at 10.200.2.1:10250
2022-07-08 14:22:13,821 INFO kube_hunter.modules.report.collector Found open service "Metrics Server" at 10.0.1.10:6443
2022-07-08 14:22:13,825 INFO kube_hunter.modules.report.collector Found open service "Metrics Server" at 10.0.1.12:6443
2022-07-08 14:22:13,857 INFO kube_hunter.modules.report.collector Found open service "Metrics Server" at 10.0.1.11:6443
2022-07-08 14:22:21,218 INFO kube_hunter.modules.report.collector Found open service "Metrics Server" at 10.0.1.72:443
2022-07-08 14:22:21,406 INFO kube_hunter.modules.report.collector Found open service "API Server" at 10.32.0.1:443
2022-07-08 14:22:21,418 INFO kube_hunter.modules.report.collector Found vulnerability "K8s Version Disclosure" in 10.32.0.1:443
2022-07-08 14:22:21,424 INFO kube_hunter.modules.report.collector Found vulnerability "Access to API using service account token" in 10.32.0.1:443
Nodes
+-------------+------------+
| TYPE | LOCATION |
+-------------+------------+
| Node/Master | 10.200.2.1 |
+-------------+------------+
| Node/Master | 10.32.0.1 |
+-------------+------------+
| Node/Master | 10.0.1.72 |
+-------------+------------+
| Node/Master | 10.0.1.22 |
+-------------+------------+
| Node/Master | 10.0.1.21 |
+-------------+------------+
| Node/Master | 10.0.1.20 |
+-------------+------------+
| Node/Master | 10.0.1.12 |
+-------------+------------+
| Node/Master | 10.0.1.11 |
+-------------+------------+
| Node/Master | 10.0.1.10 |
+-------------+------------+
Detected Services
+----------------+------------------+----------------------+
| SERVICE | LOCATION | DESCRIPTION |
+----------------+------------------+----------------------+
| Metrics Server | 10.0.1.72:443 | The Metrics server |
| | | is in charge of |
| | | providing resource |
| | | usage metrics for |
| | | pods and nodes to |
| | | the API server |
+----------------+------------------+----------------------+
| Metrics Server | 10.0.1.12:6443 | The Metrics server |
| | | is in charge of |
| | | providing resource |
| | | usage metrics for |
| | | pods and nodes to |
| | | the API server |
+----------------+------------------+----------------------+
| Metrics Server | 10.0.1.11:6443 | The Metrics server |
| | | is in charge of |
| | | providing resource |
| | | usage metrics for |
| | | pods and nodes to |
| | | the API server |
+----------------+------------------+----------------------+
| Metrics Server | 10.0.1.10:6443 | The Metrics server |
| | | is in charge of |
| | | providing resource |
| | | usage metrics for |
| | | pods and nodes to |
| | | the API server |
+----------------+------------------+----------------------+
| Kubelet API | 10.200.2.1:10250 | The Kubelet is the |
| | | main component in |
| | | every Node, all pod |
| | | operations goes |
| | | through the kubelet |
+----------------+------------------+----------------------+
| Kubelet API | 10.0.1.22:10250 | The Kubelet is the |
| | | main component in |
| | | every Node, all pod |
| | | operations goes |
| | | through the kubelet |
+----------------+------------------+----------------------+
| Kubelet API | 10.0.1.21:10250 | The Kubelet is the |
| | | main component in |
| | | every Node, all pod |
| | | operations goes |
| | | through the kubelet |
+----------------+------------------+----------------------+
| Kubelet API | 10.0.1.20:10250 | The Kubelet is the |
| | | main component in |
| | | every Node, all pod |
| | | operations goes |
| | | through the kubelet |
+----------------+------------------+----------------------+
| Etcd | 10.0.1.12:2379 | Etcd is a DB that |
| | | stores cluster's |
| | | data, it contains |
| | | configuration and |
| | | current |
| | | state |
| | | information, and |
| | | might contain |
| | | secrets |
+----------------+------------------+----------------------+
| Etcd | 10.0.1.11:2379 | Etcd is a DB that |
| | | stores cluster's |
| | | data, it contains |
| | | configuration and |
| | | current |
| | | state |
| | | information, and |
| | | might contain |
| | | secrets |
+----------------+------------------+----------------------+
| Etcd | 10.0.1.10:2379 | Etcd is a DB that |
| | | stores cluster's |
| | | data, it contains |
| | | configuration and |
| | | current |
| | | state |
| | | information, and |
| | | might contain |
| | | secrets |
+----------------+------------------+----------------------+
| API Server | 10.32.0.1:443 | The API server is in |
| | | charge of all |
| | | operations on the |
| | | cluster. |
+----------------+------------------+----------------------+
Vulnerabilities
For further information about a vulnerability, search its ID in:
https://avd.aquasec.com/
+--------+----------------------+----------------------+----------------------+----------------------+----------------------+
| ID | LOCATION | MITRE CATEGORY | VULNERABILITY | DESCRIPTION | EVIDENCE |
+--------+----------------------+----------------------+----------------------+----------------------+----------------------+
| None | Local to Pod (kube- | Lateral Movement // | CAP_NET_RAW Enabled | CAP_NET_RAW is | |
| | hunter-tws6b) | ARP poisoning and IP | | enabled by default | |
| | | spoofing | | for pods. | |
| | | | | If an attacker | |
| | | | | manages to | |
| | | | | compromise a pod, | |
| | | | | they could | |
| | | | | potentially take | |
| | | | | advantage of this | |
| | | | | capability to | |
| | | | | perform network | |
| | | | | attacks on other | |
| | | | | pods running on the | |
| | | | | same node | |
+--------+----------------------+----------------------+----------------------+----------------------+----------------------+
| KHV002 | 10.32.0.1:443 | Initial Access // | K8s Version | The kubernetes | v1.21.0 |
| | | Exposed sensitive | Disclosure | version could be | |
| | | interfaces | | obtained from the | |
| | | | | /version endpoint | |
+--------+----------------------+----------------------+----------------------+----------------------+----------------------+
| KHV053 | Local to Pod (kube- | Discovery // | AWS Metadata | Access to the AWS | cidr: 10.0.1.0/24 |
| | hunter-tws6b) | Instance Metadata | Exposure | Metadata API exposes | |
| | | API | | information about | |
| | | | | the machines | |
| | | | | associated with the | |
| | | | | cluster | |
+--------+----------------------+----------------------+----------------------+----------------------+----------------------+
| KHV005 | 10.32.0.1:443 | Discovery // Access | Access to API using | The API Server port | b'{"kind":"APIVersio |
| | | the K8S API Server | service account | is accessible. | ns","versions":["v1" |
| | | | token | Depending on | ],"serverAddressByCl |
| | | | | your RBAC settings | ientCIDRs":[{"client |
| | | | | this could expose | CIDR":"0.0.0.0/0","s |
| | | | | access to or control | ... |
| | | | | of your cluster. | |
+--------+----------------------+----------------------+----------------------+----------------------+----------------------+
| None | Local to Pod (kube- | Credential Access // | Access to pod's | Accessing the pod's | ['/var/run/secrets/k |
| | hunter-tws6b) | Access container | secrets | secrets within a | ubernetes.io/service |
| | | service account | | compromised pod | account/namespace', |
| | | | | might disclose | '/var/run/secrets/ku |
| | | | | valuable data to a | bernetes.io/servicea |
| | | | | potential attacker | ... |
+--------+----------------------+----------------------+----------------------+----------------------+----------------------+
| KHV050 | Local to Pod (kube- | Credential Access // | Read access to pod's | Accessing the pod | eyJhbGciOiJSUzI1NiIs |
| | hunter-tws6b) | Access container | service account | service account | ImtpZCI6IjItYnpCa1pK |
| | | service account | token | token gives an | aE1pTVpXZE1qSkhnRDA5 |
| | | | | attacker the option | YmdMZ3BLdmNxejV4VVYw |
| | | | | to use the server | OW12LVEifQ.eyJhdWQiO |
| | | | | API | ... |
+--------+----------------------+----------------------+----------------------+----------------------+----------------------+
From the log output above you can see there is quite a bit of information around vulnerabilities and also some potential resolution steps. You can use this output to start patching your Kubernetes cluster to ensure you are getting the most security that you need.
Cleaning Up
Make sure you remove all of the resources we created, or else it will incure running costs if left running.
Delete all the worker instances, then afterwards delete controller instances, also delete our key-pair:
1
2
3
4
5
6
7
8
9
10
11
12
13
14
15
16
17
18
19
20
21
22
23
24
25
26
27
28
29
30
31
echo "Issuing shutdown to worker nodes.. " && \
aws ec2 terminate-instances \
  --instance-ids \
    $(aws ec2 describe-instances --filters \
      "Name=tag:Name,Values=worker-0,worker-1,worker-2" \
      "Name=instance-state-name,Values=running" \
      --output text --query 'Reservations[].Instances[].InstanceId')

echo "Waiting for worker nodes to finish terminating.. " && \
aws ec2 wait instance-terminated \
  --instance-ids \
    $(aws ec2 describe-instances \
      --filter "Name=tag:Name,Values=worker-0,worker-1,worker-2" \
      --output text --query 'Reservations[].Instances[].InstanceId')

echo "Issuing shutdown to master nodes.. " && \
aws ec2 terminate-instances \
  --instance-ids \
    $(aws ec2 describe-instances --filter \
      "Name=tag:Name,Values=controller-0,controller-1,controller-2" \
      "Name=instance-state-name,Values=running" \
      --output text --query 'Reservations[].Instances[].InstanceId')

echo "Waiting for master nodes to finish terminating.. " && \
aws ec2 wait instance-terminated \
  --instance-ids \
    $(aws ec2 describe-instances \
      --filter "Name=tag:Name,Values=controller-0,controller-1,controller-2" \
      --output text --query 'Reservations[].Instances[].InstanceId')

aws ec2 delete-key-pair --key-name kubernetes
Delete the external load balancer and network resources (if you have lost the values of any of the environment variables, then you can use AWS commands to look them up, or you can manually set them by looking at the resources in the AWS console):
1
2
3
4
5
6
7
8
9
10
11
12
13
14
15
16
17
18
19
20
21
22
23
24
25
aws elbv2 delete-load-balancer --load-balancer-arn "${LOAD_BALANCER_ARN}"

aws elbv2 delete-target-group --target-group-arn "${TARGET_GROUP_ARN}"

aws ec2 delete-security-group --group-id "${SECURITY_GROUP_ID}"

ROUTE_TABLE_ASSOCIATION_ID="$(aws ec2 describe-route-tables \
  --route-table-ids "${ROUTE_TABLE_ID}" \
  --output text --query 'RouteTables[].Associations[].RouteTableAssociationId')"

aws ec2 disassociate-route-table --association-id "${ROUTE_TABLE_ASSOCIATION_ID}"

aws ec2 delete-route-table --route-table-id "${ROUTE_TABLE_ID}"

echo "Waiting a minute for all public address(es) to be unmapped.. " && sleep 60

aws ec2 detach-internet-gateway \
  --internet-gateway-id "${INTERNET_GATEWAY_ID}" \
  --vpc-id "${VPC_ID}"

aws ec2 delete-internet-gateway --internet-gateway-id "${INTERNET_GATEWAY_ID}"

aws ec2 delete-subnet --subnet-id "${SUBNET_ID}"

aws ec2 delete-vpc --vpc-id "${VPC_ID}"
I cannot stress this enough, go through your AWS console resources and ensure that you have removed everything we have provisioned in this guide. You don’t want to come back a year later wondering why your credit card balance is hurting!!!
Thanks for reading.
Medium Article: https://medium.com/geekculture/building-a-kubernetes-cluster-on-aws-from-scratch-7e1e8b0342c4